
Five Exercises from a Physical Therapist to Kickstart Your New Year’s Fitness Resolutions
The turn of the new year means the return of a familiar goal – to get in shape. Many people either jump into it too intensely and either get burnt out or injured, or there are some people who want to get in shape but don’t know where to start. If you have struggled with adhering to an exercise program due to pain or injury, let this be the year you empower yourself with the knowledge how to move better and feel better. Channing Harwood, PT, DPT, OCS, Physical Therapist at PTSMC Plainville put together five “prehab” exercises that will help prevent injury as you transition back to the gym in the new year, so that you can kickstart your goals!
*As always, consult your physical therapist or physician with questions or concerns, and before starting any new fitness regimen; we are here to help and guide you!
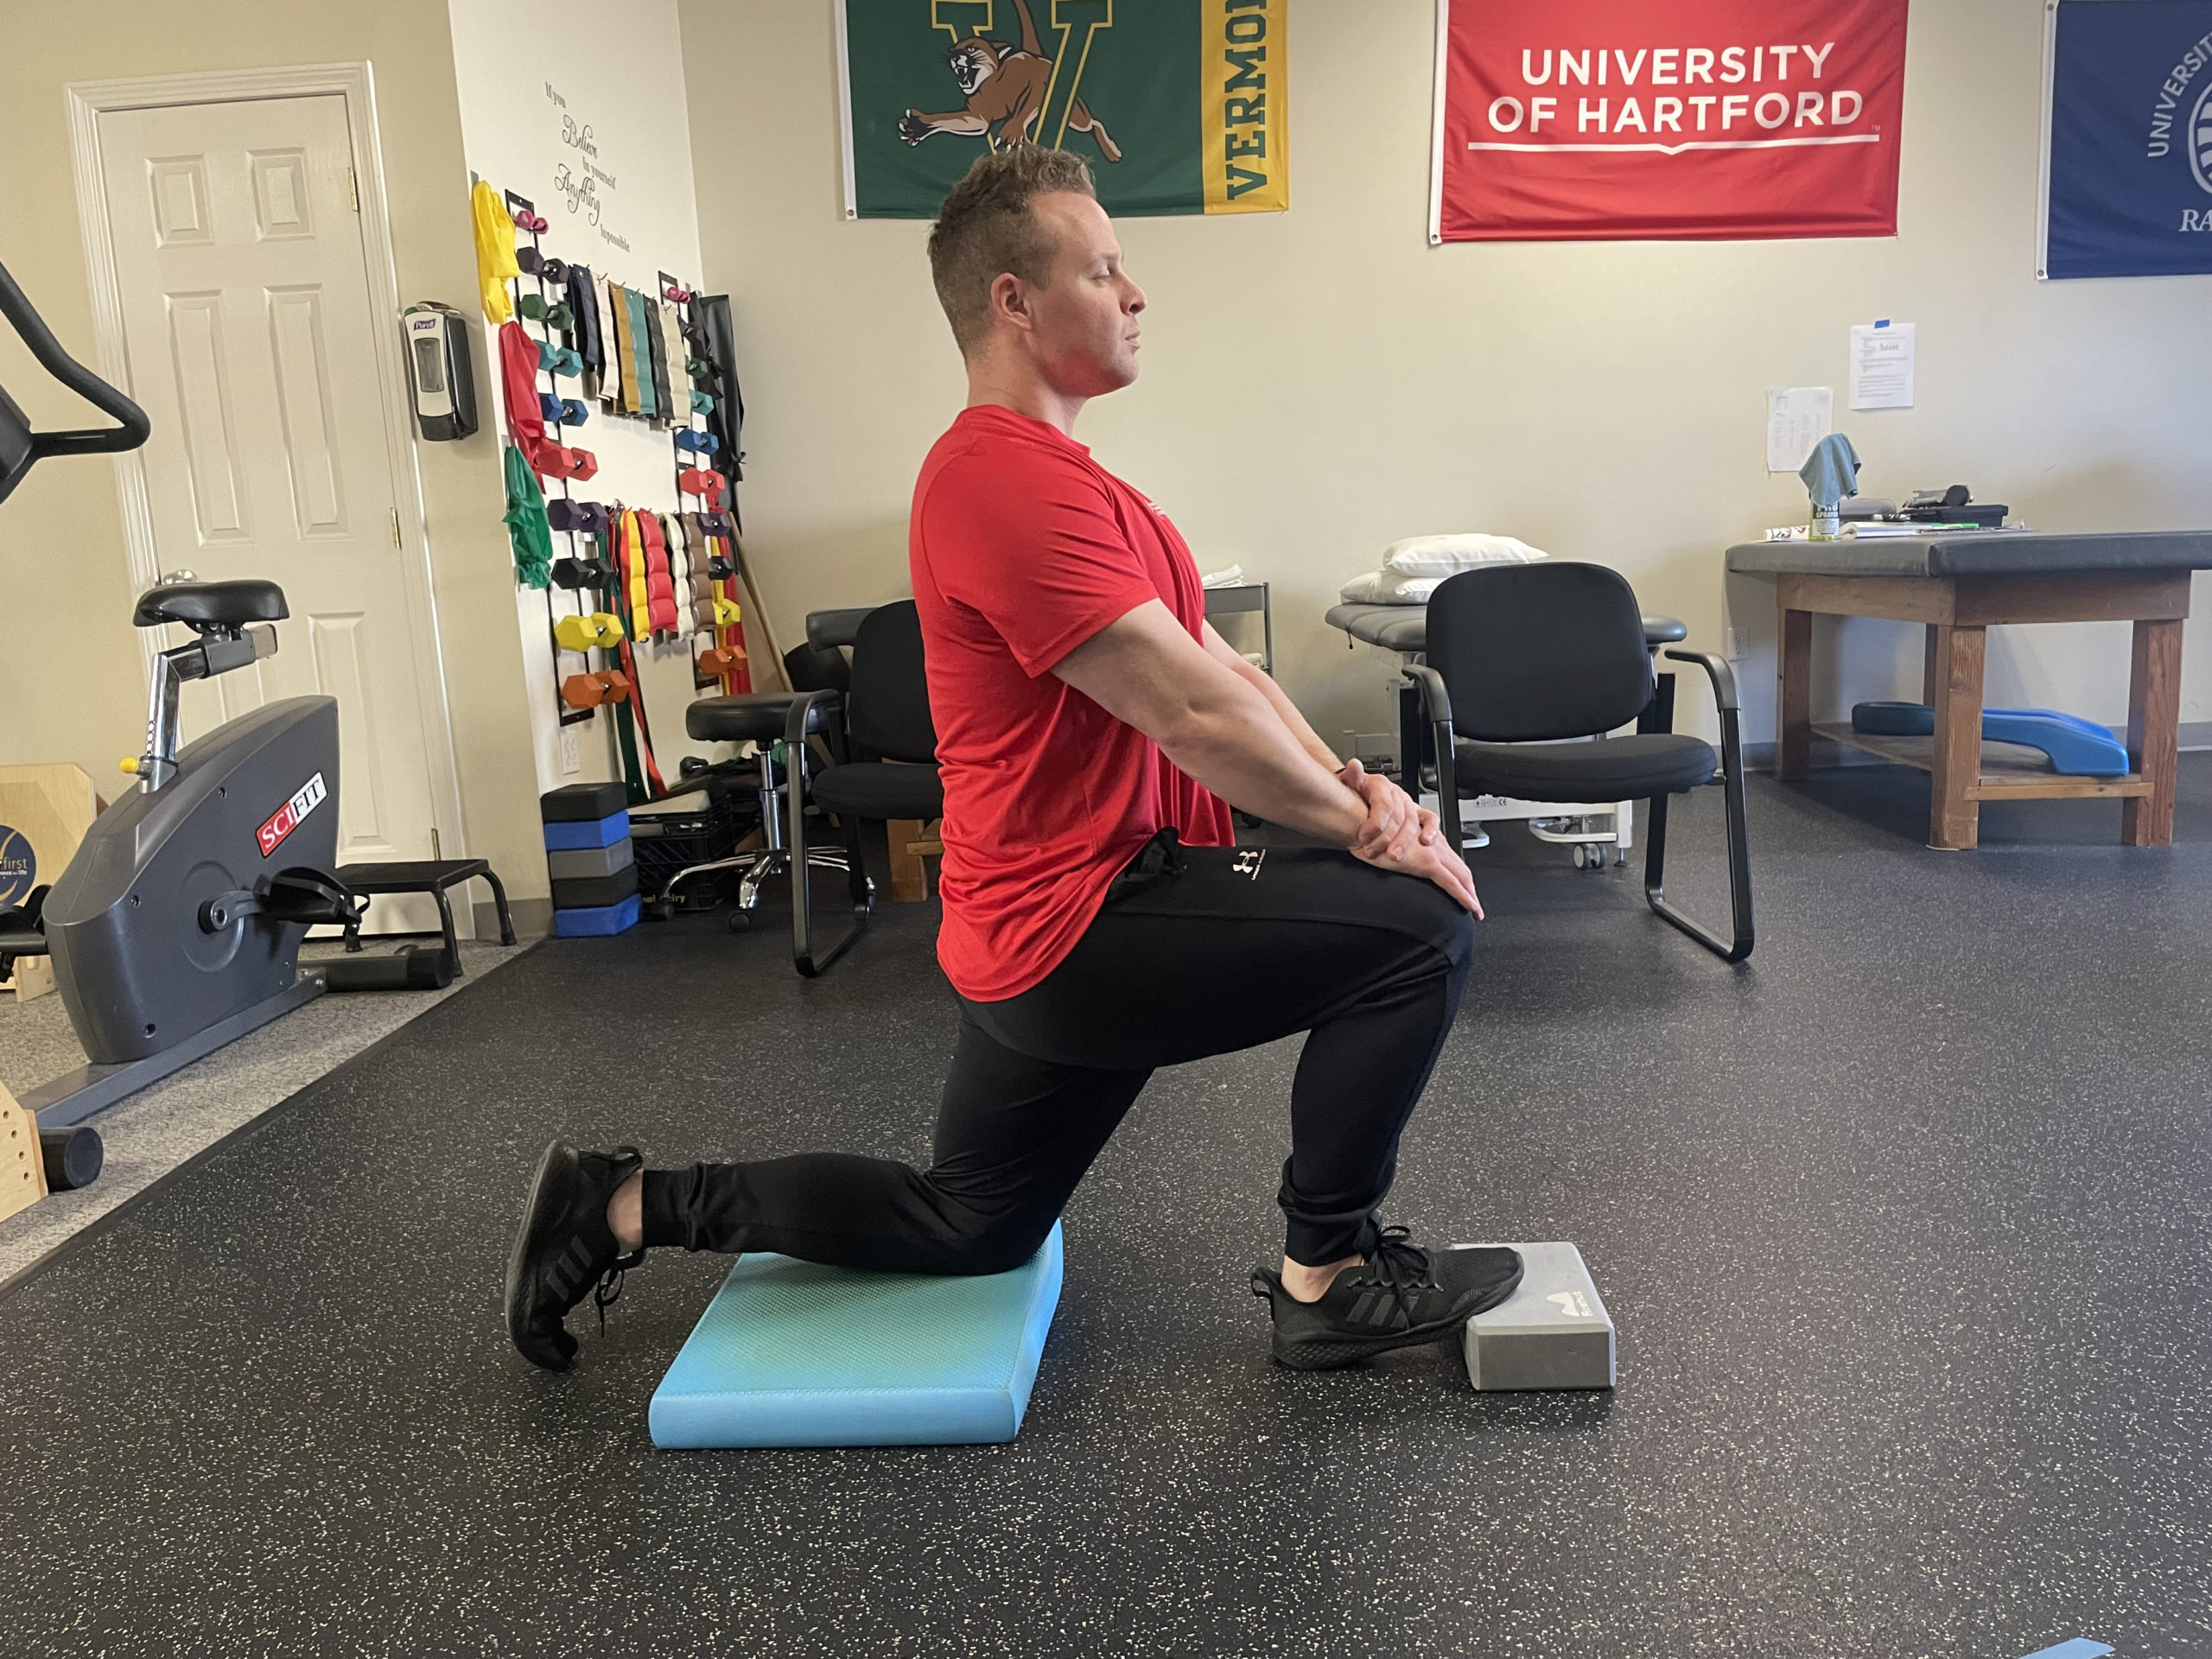
1. ½ Kneeling Dorsiflexion
This drill is excellent to help loosen stiff ankles prior to squatting or running. Many people have stiff ankles, especially those who sit at a desk all day. While it may not seem directly related, ankle stiffness (or limitations in ankle mobility) may lead to low back pain in squatting. Lack of ankle dorsiflexion (bringing your foot closer to your shin bone) will cause your heels to lift off the ground as you squat deeper. When your heels start to lift, your back tends to round, making you more susceptible to injury.
To perform this exercise, start in a ½ kneeling position (on one knee). Rock your knee over your toes as far as you can prior to your heel lifting. You should feel a pressure type stretch in the front of your ankle, as well as a slight stretch in your Achilles tendon. This is not a static stretch, so instead of holding the position, gently rock back and forth for 20 repetitions per side.
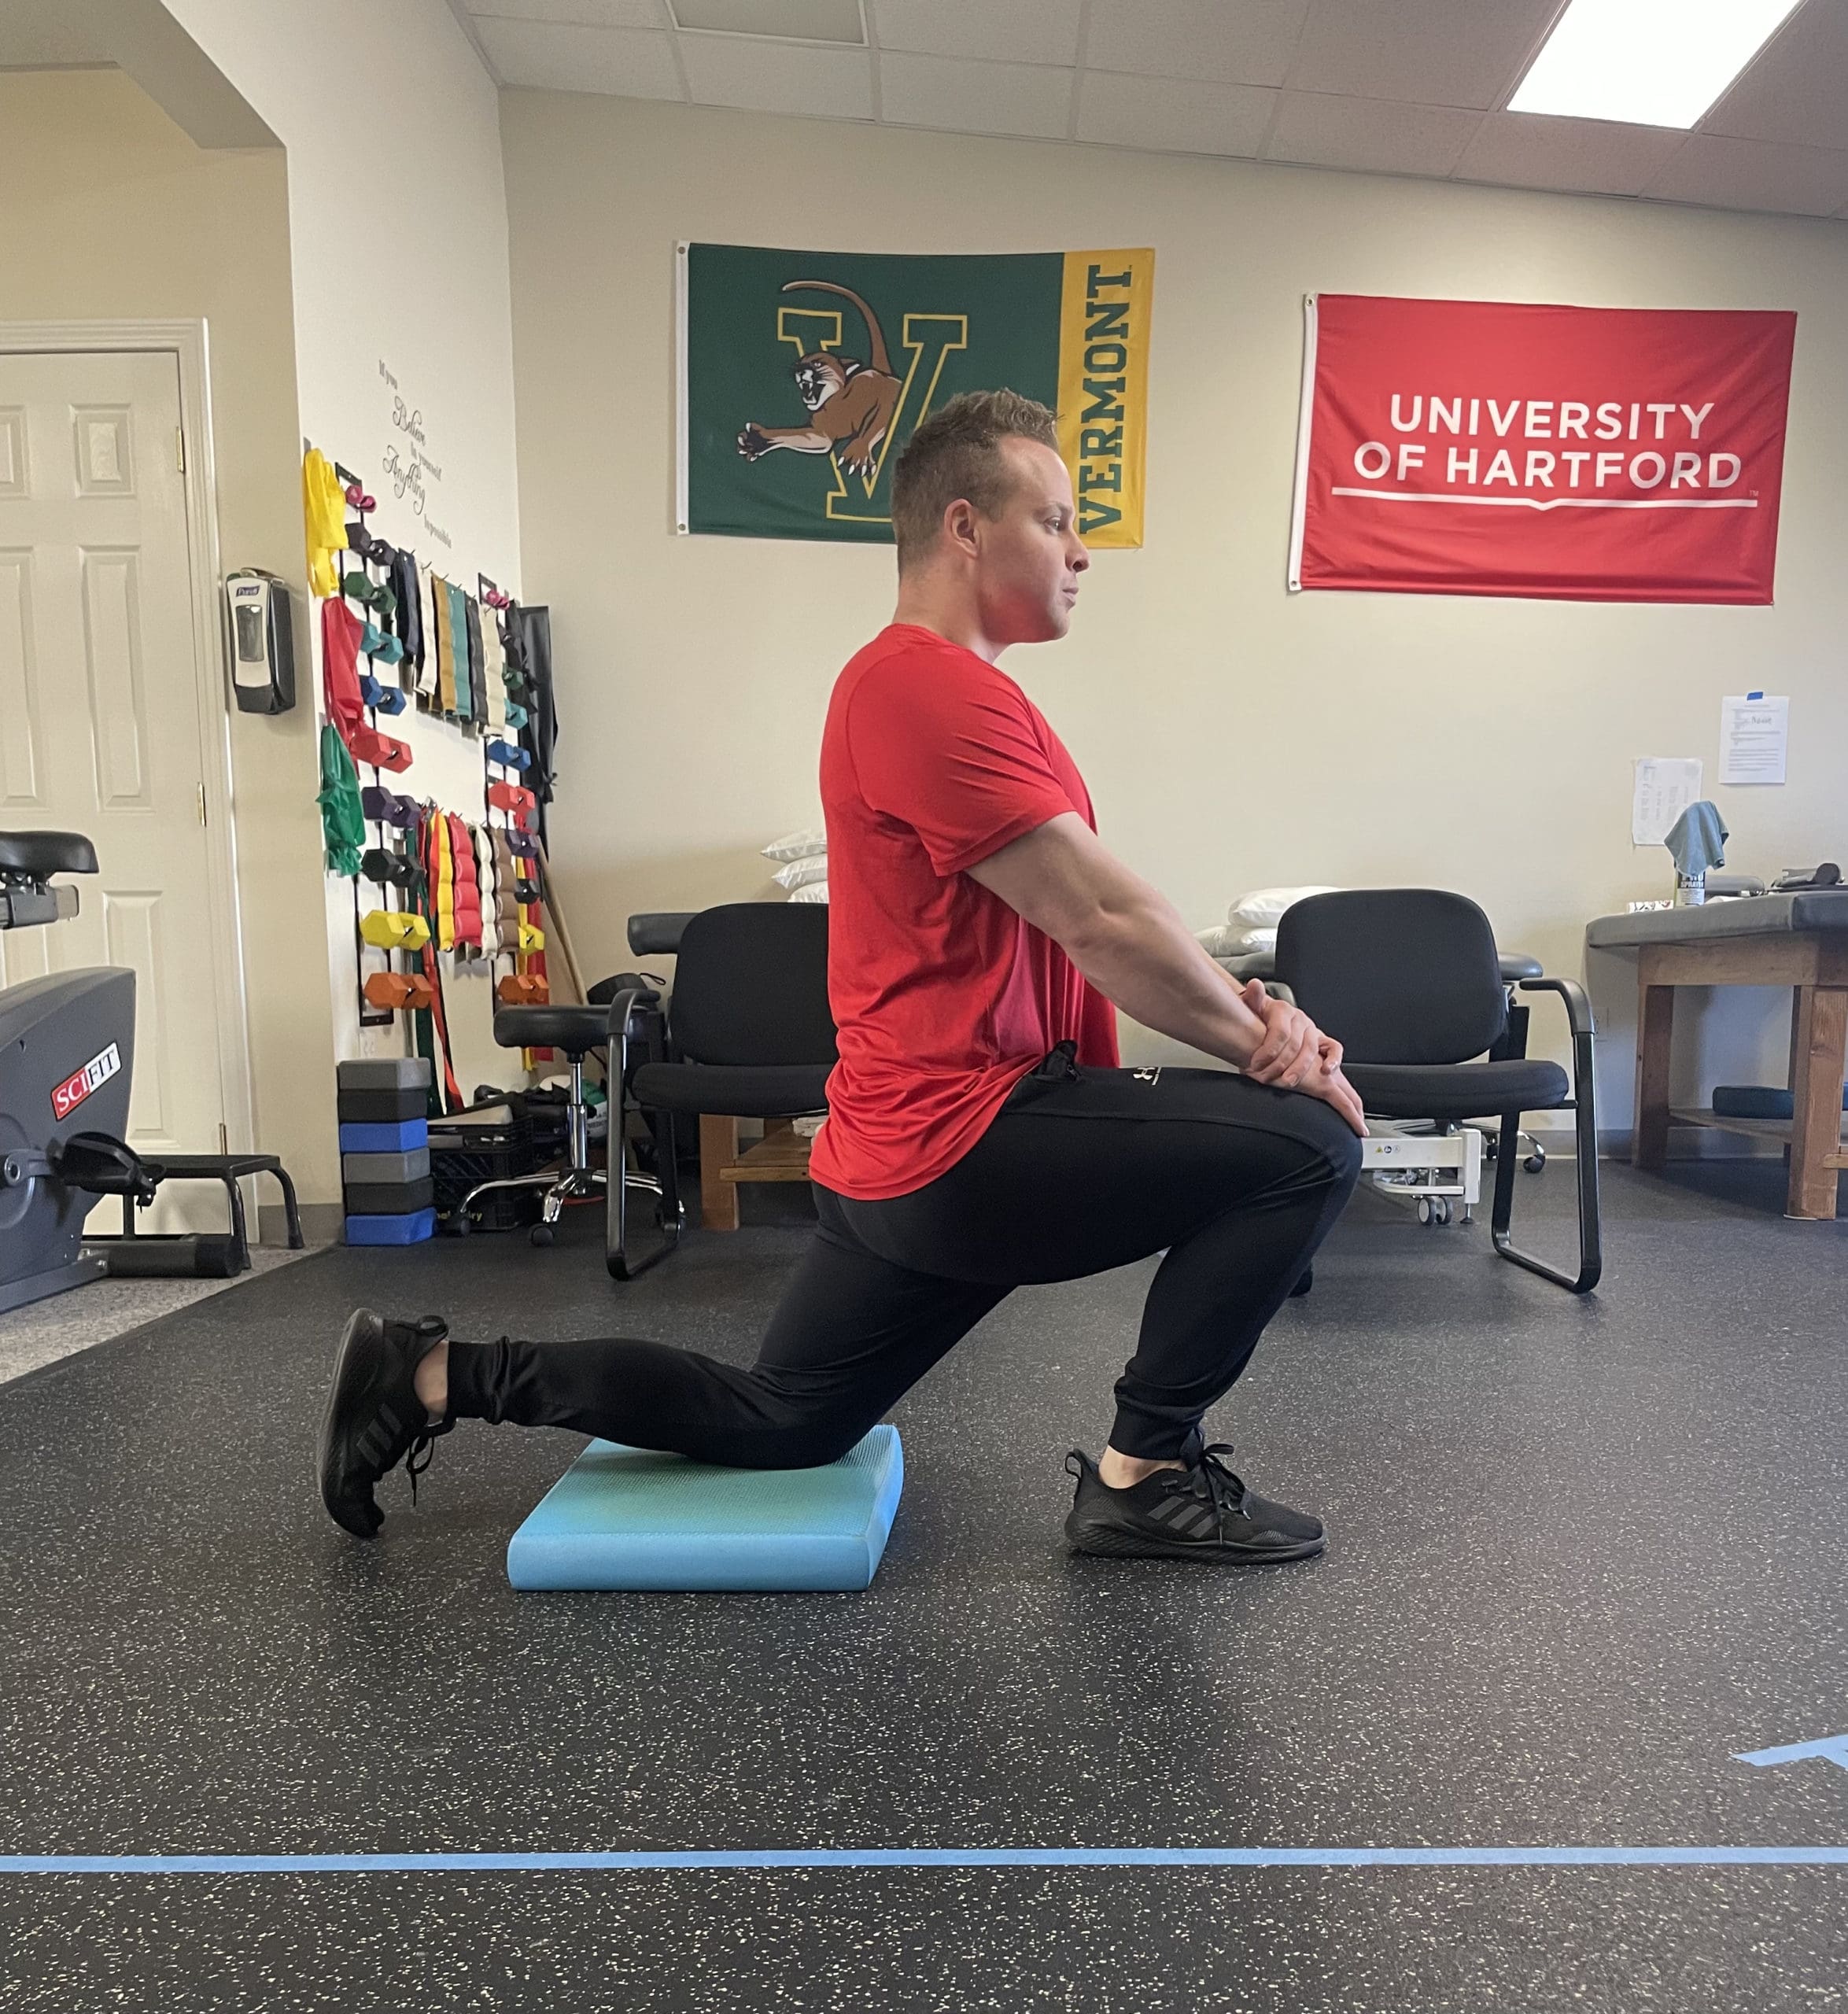
If you do not feel the stretch, try elevating your lead foot on a yoga block or wedge to increase the effectiveness. Keep in mind, this is not a hip flexor stretch, so you should not feel most of the stretch in your back hip. If you do, try a shorter stance.
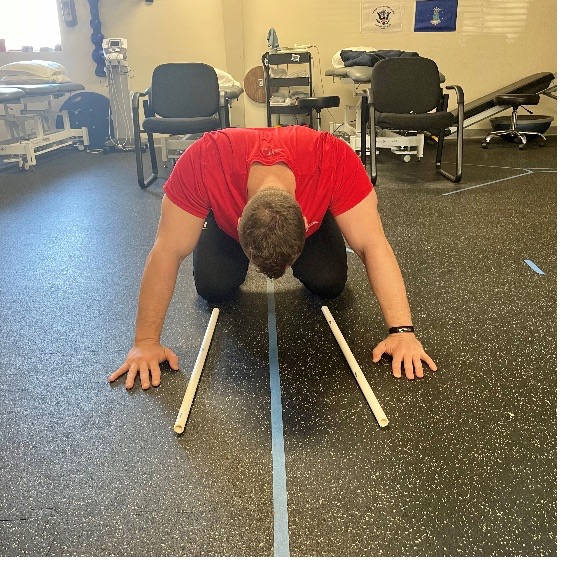
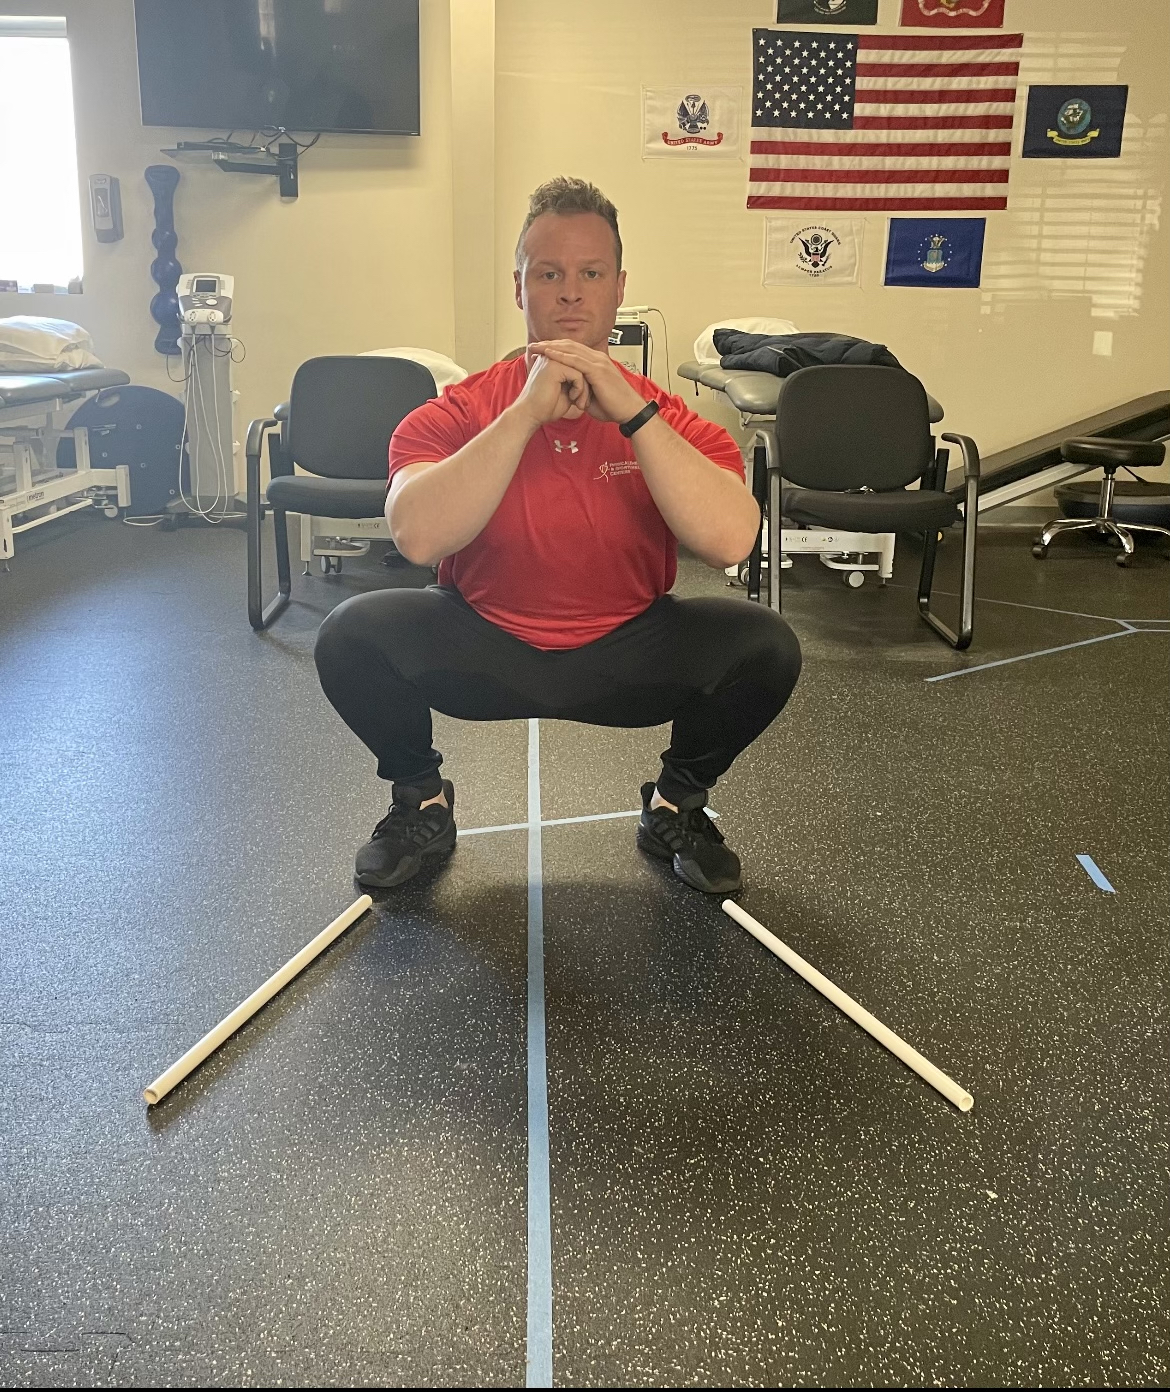
2. Quadruped Hip Hinge
A common technique cue you may hear during squatting or deadlifting is to keep your toes forward. However, is this a good idea for everyone?
There are variations in the anatomy of people’s hips, so this may actually be poor advice. For example, if someone has particularly retroverted hips, they will feel most comfortable when their feet are angled outward a bit; think toes pointed at 10 and 2 on a clock.
So how do you know the most ideal position for you to squat in? The quadruped hip hinge! Start on all fours and gently sit your hips backwards. Try starting with your knees pointed straight ahead, and gradually angle them out further and further with each rep. You are looking for the most comfortable position where you can sit your hips backward and not experience any pinching in your hips or low back pain.
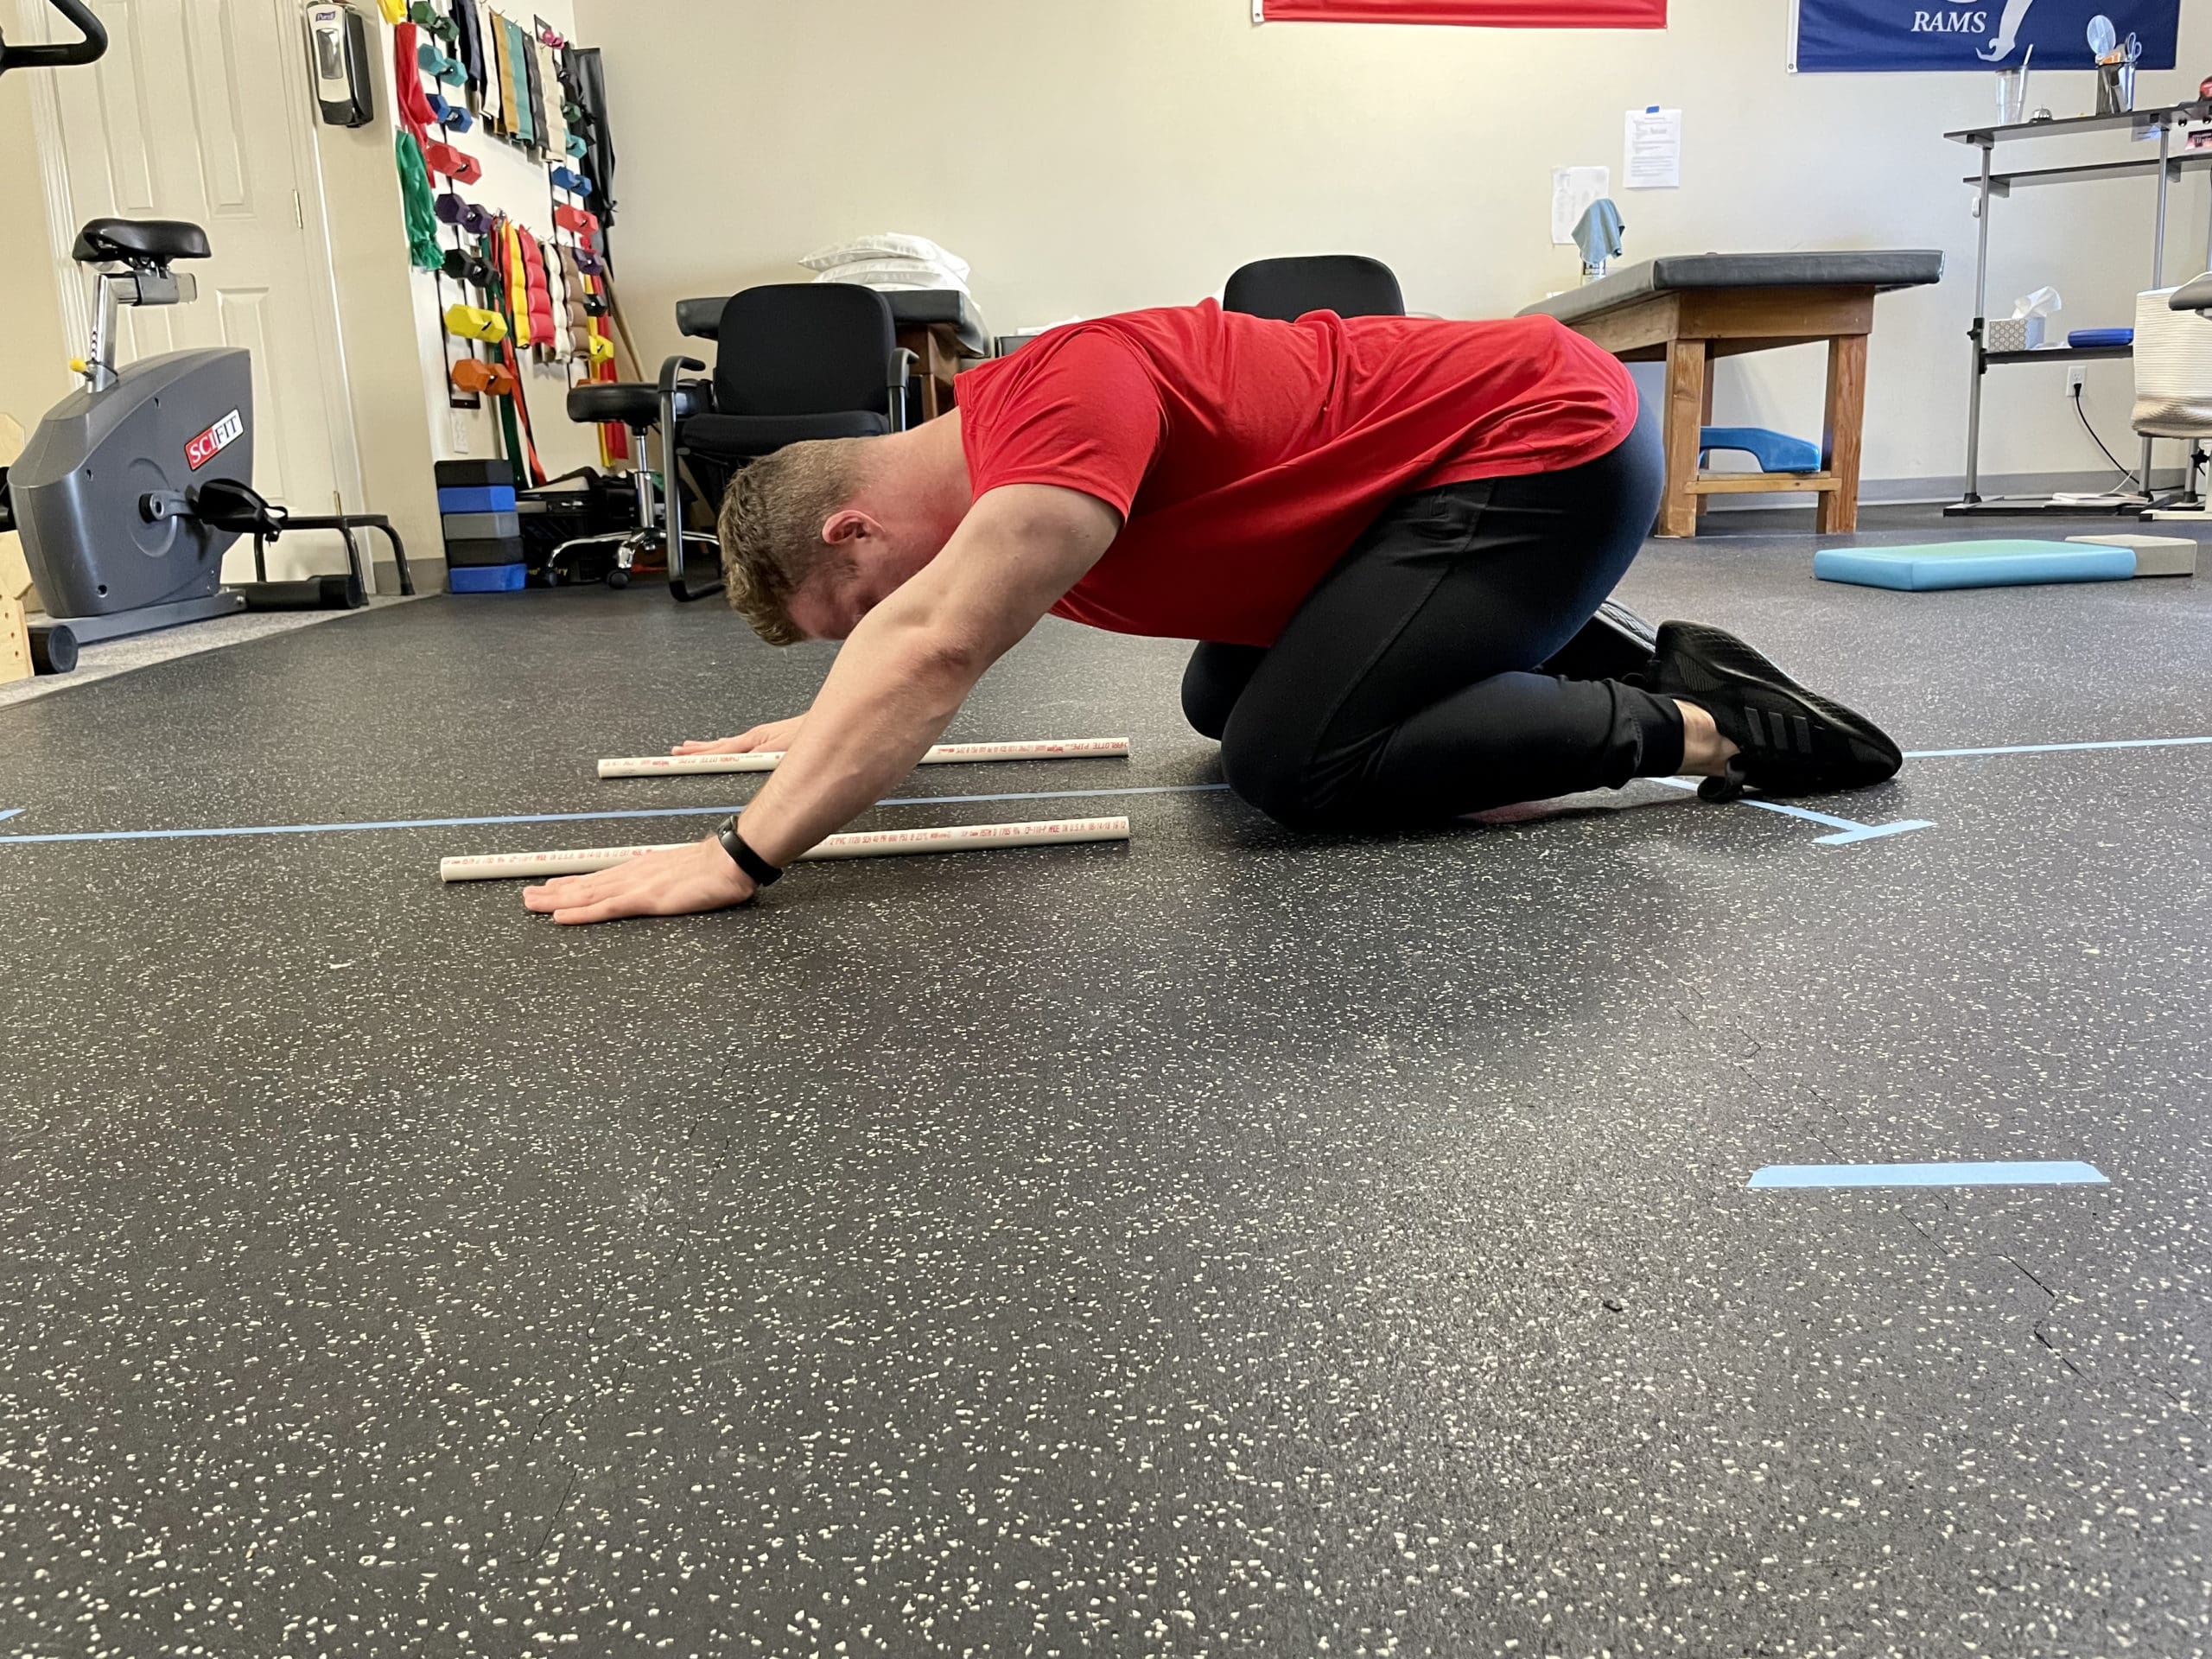
The following pictures demonstrate a wider hip position, allowing for a more comfortable hip hinge and sitting back deeper.
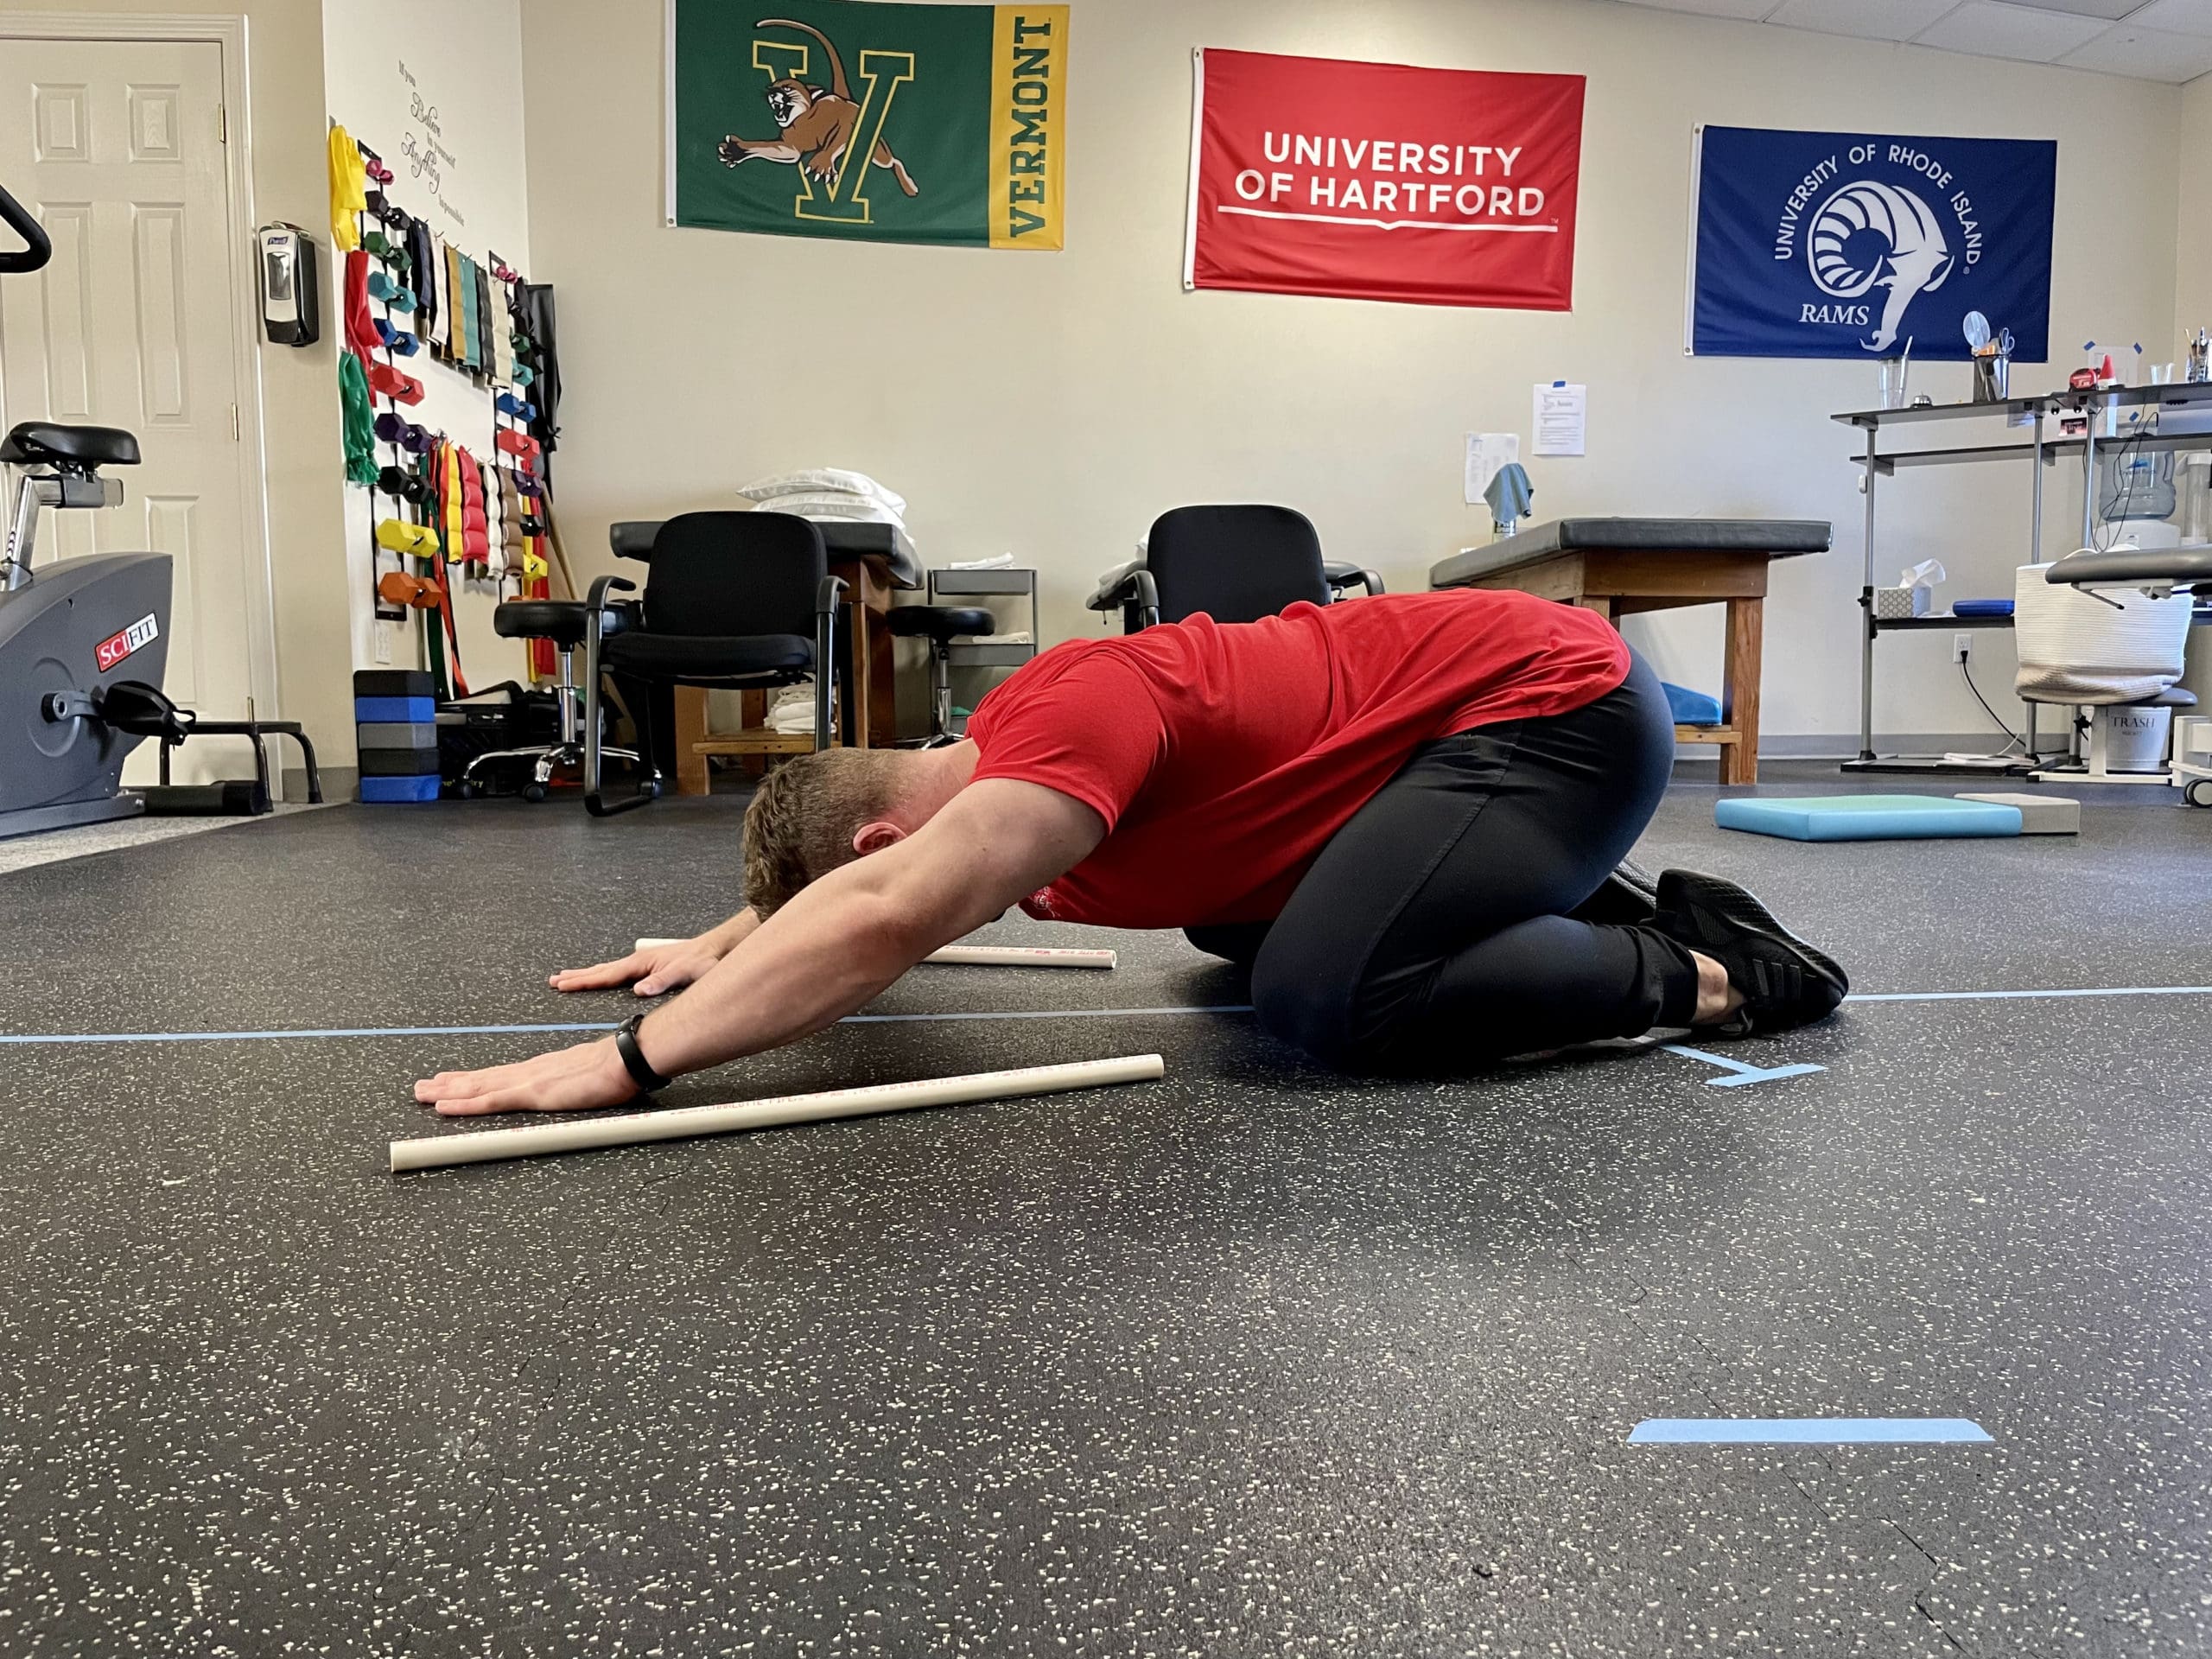
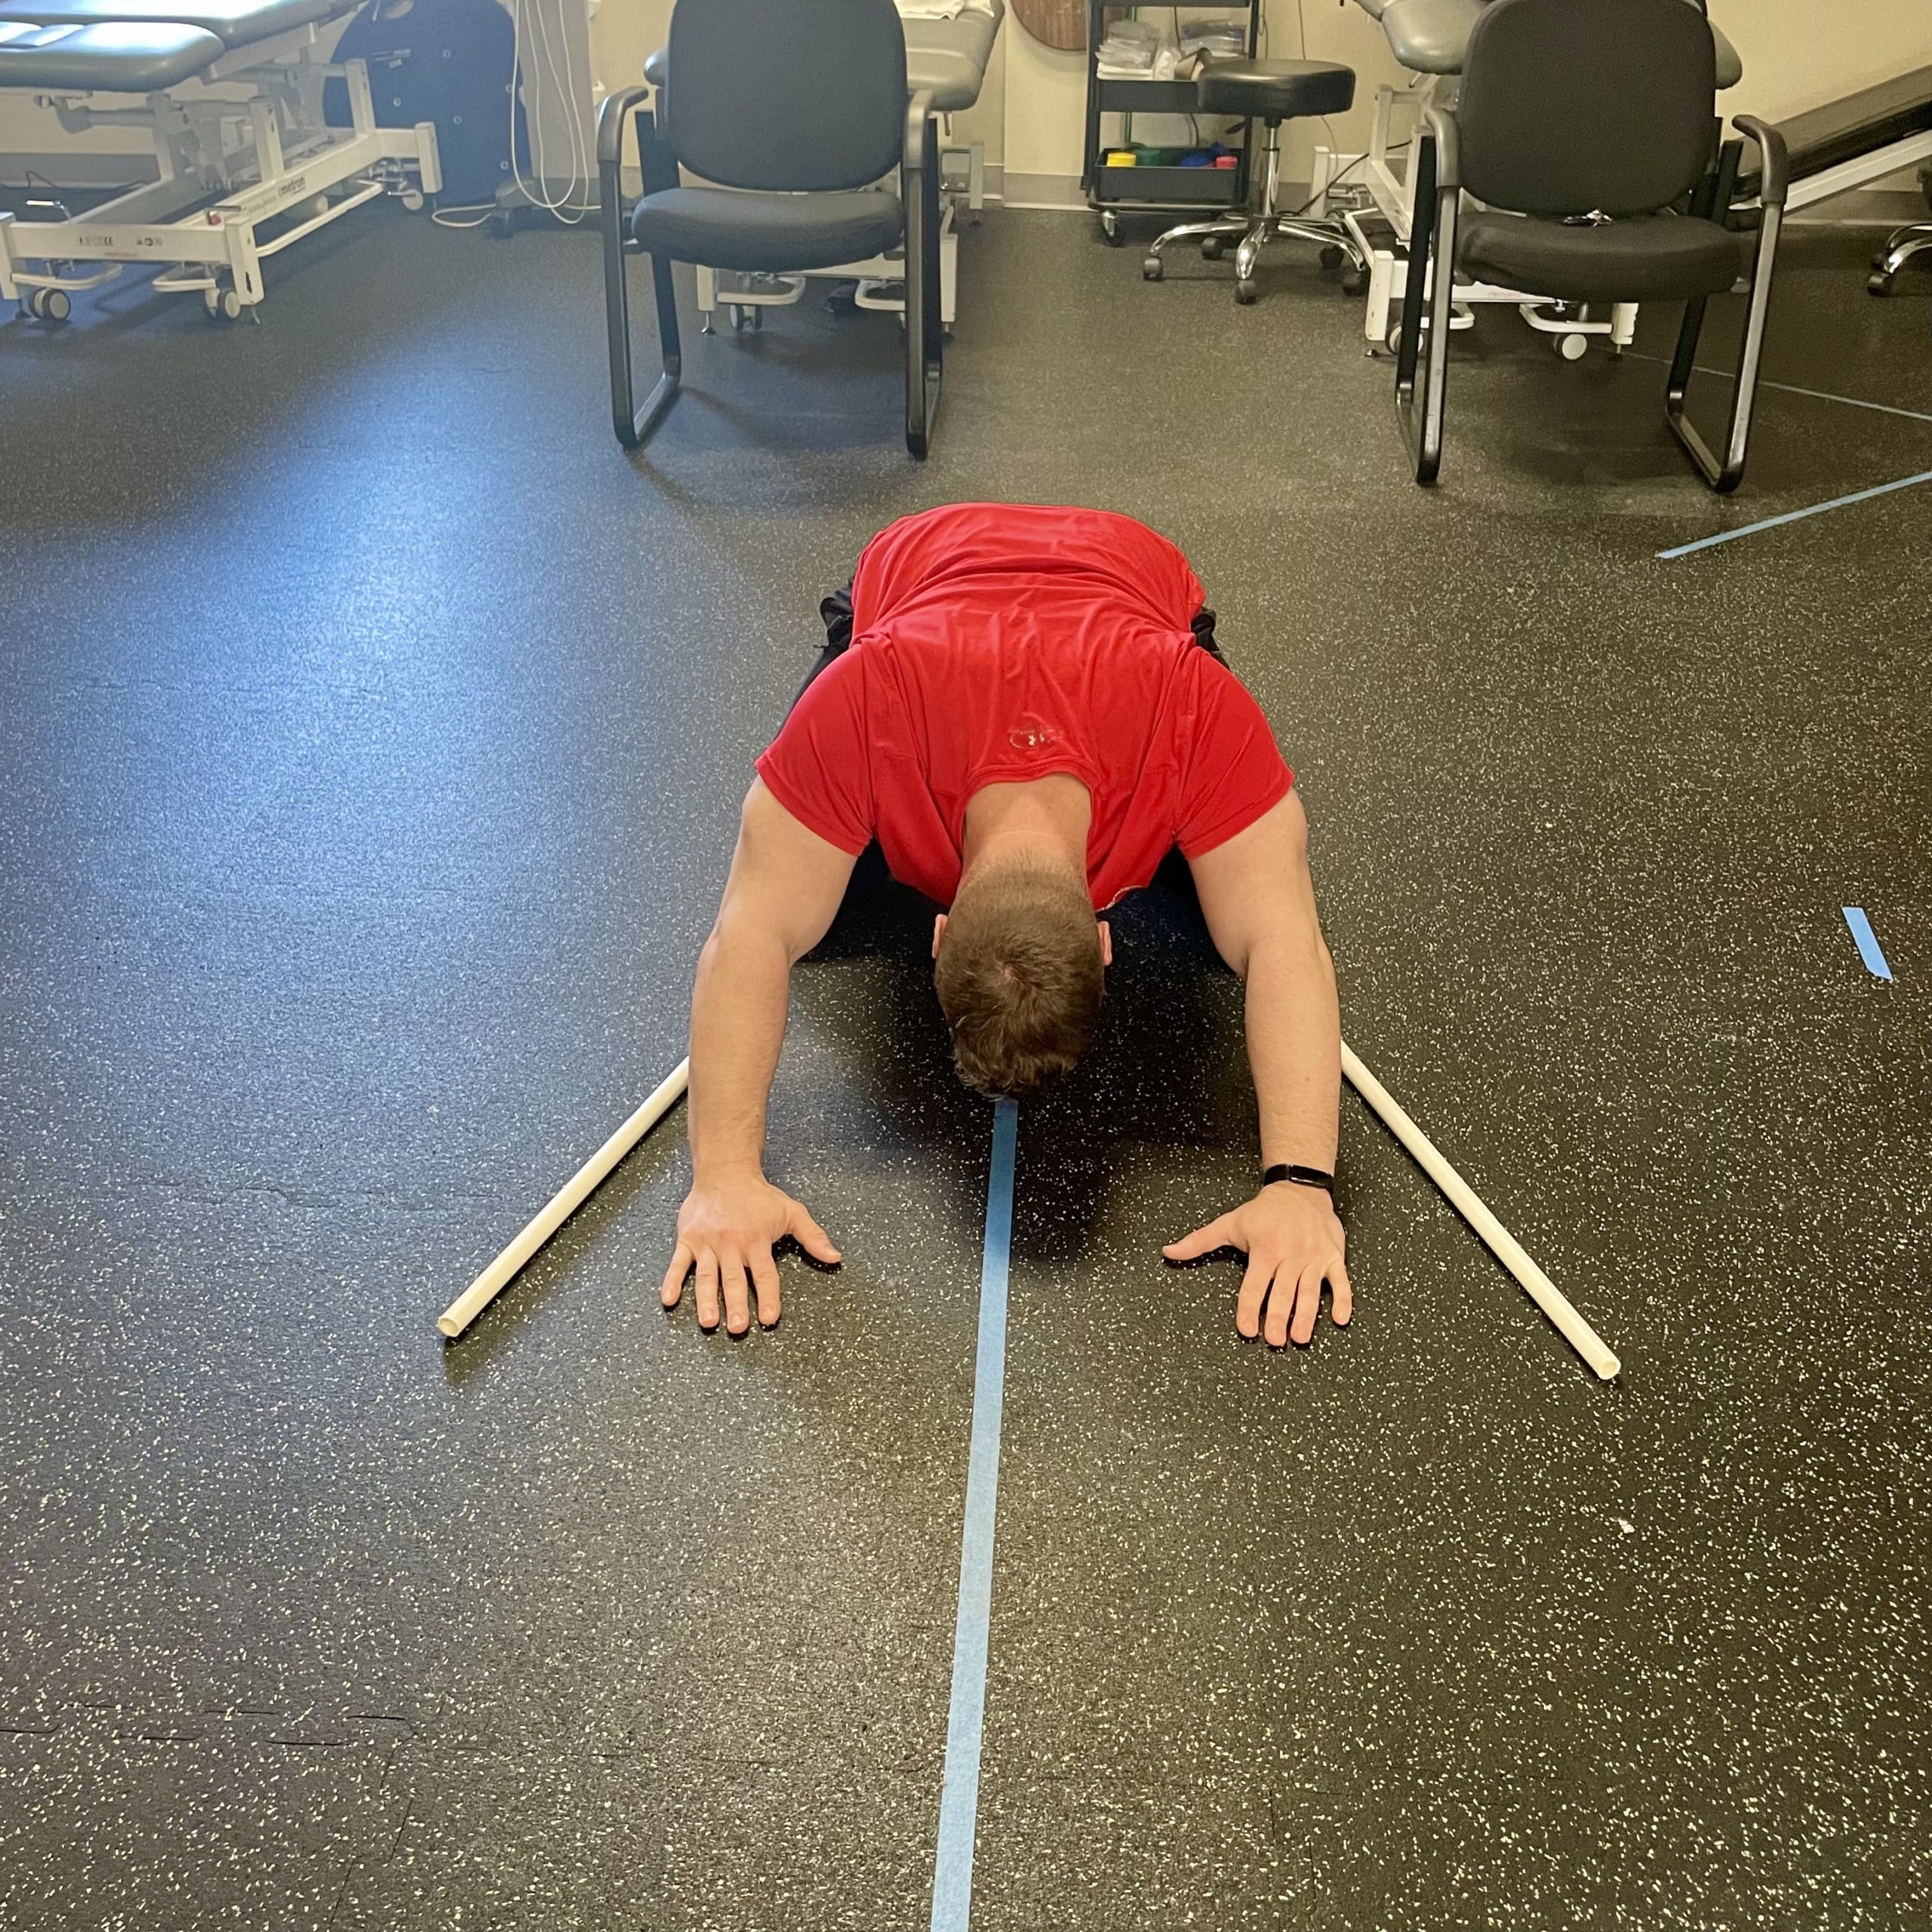
Once you find that angle that feels good, repeat for 10 repetitions. This is meant to be more of technique and motor control drill, but it can also be used for hip mobility. The most important part is to use that exact same position once you are standing and doing squats.
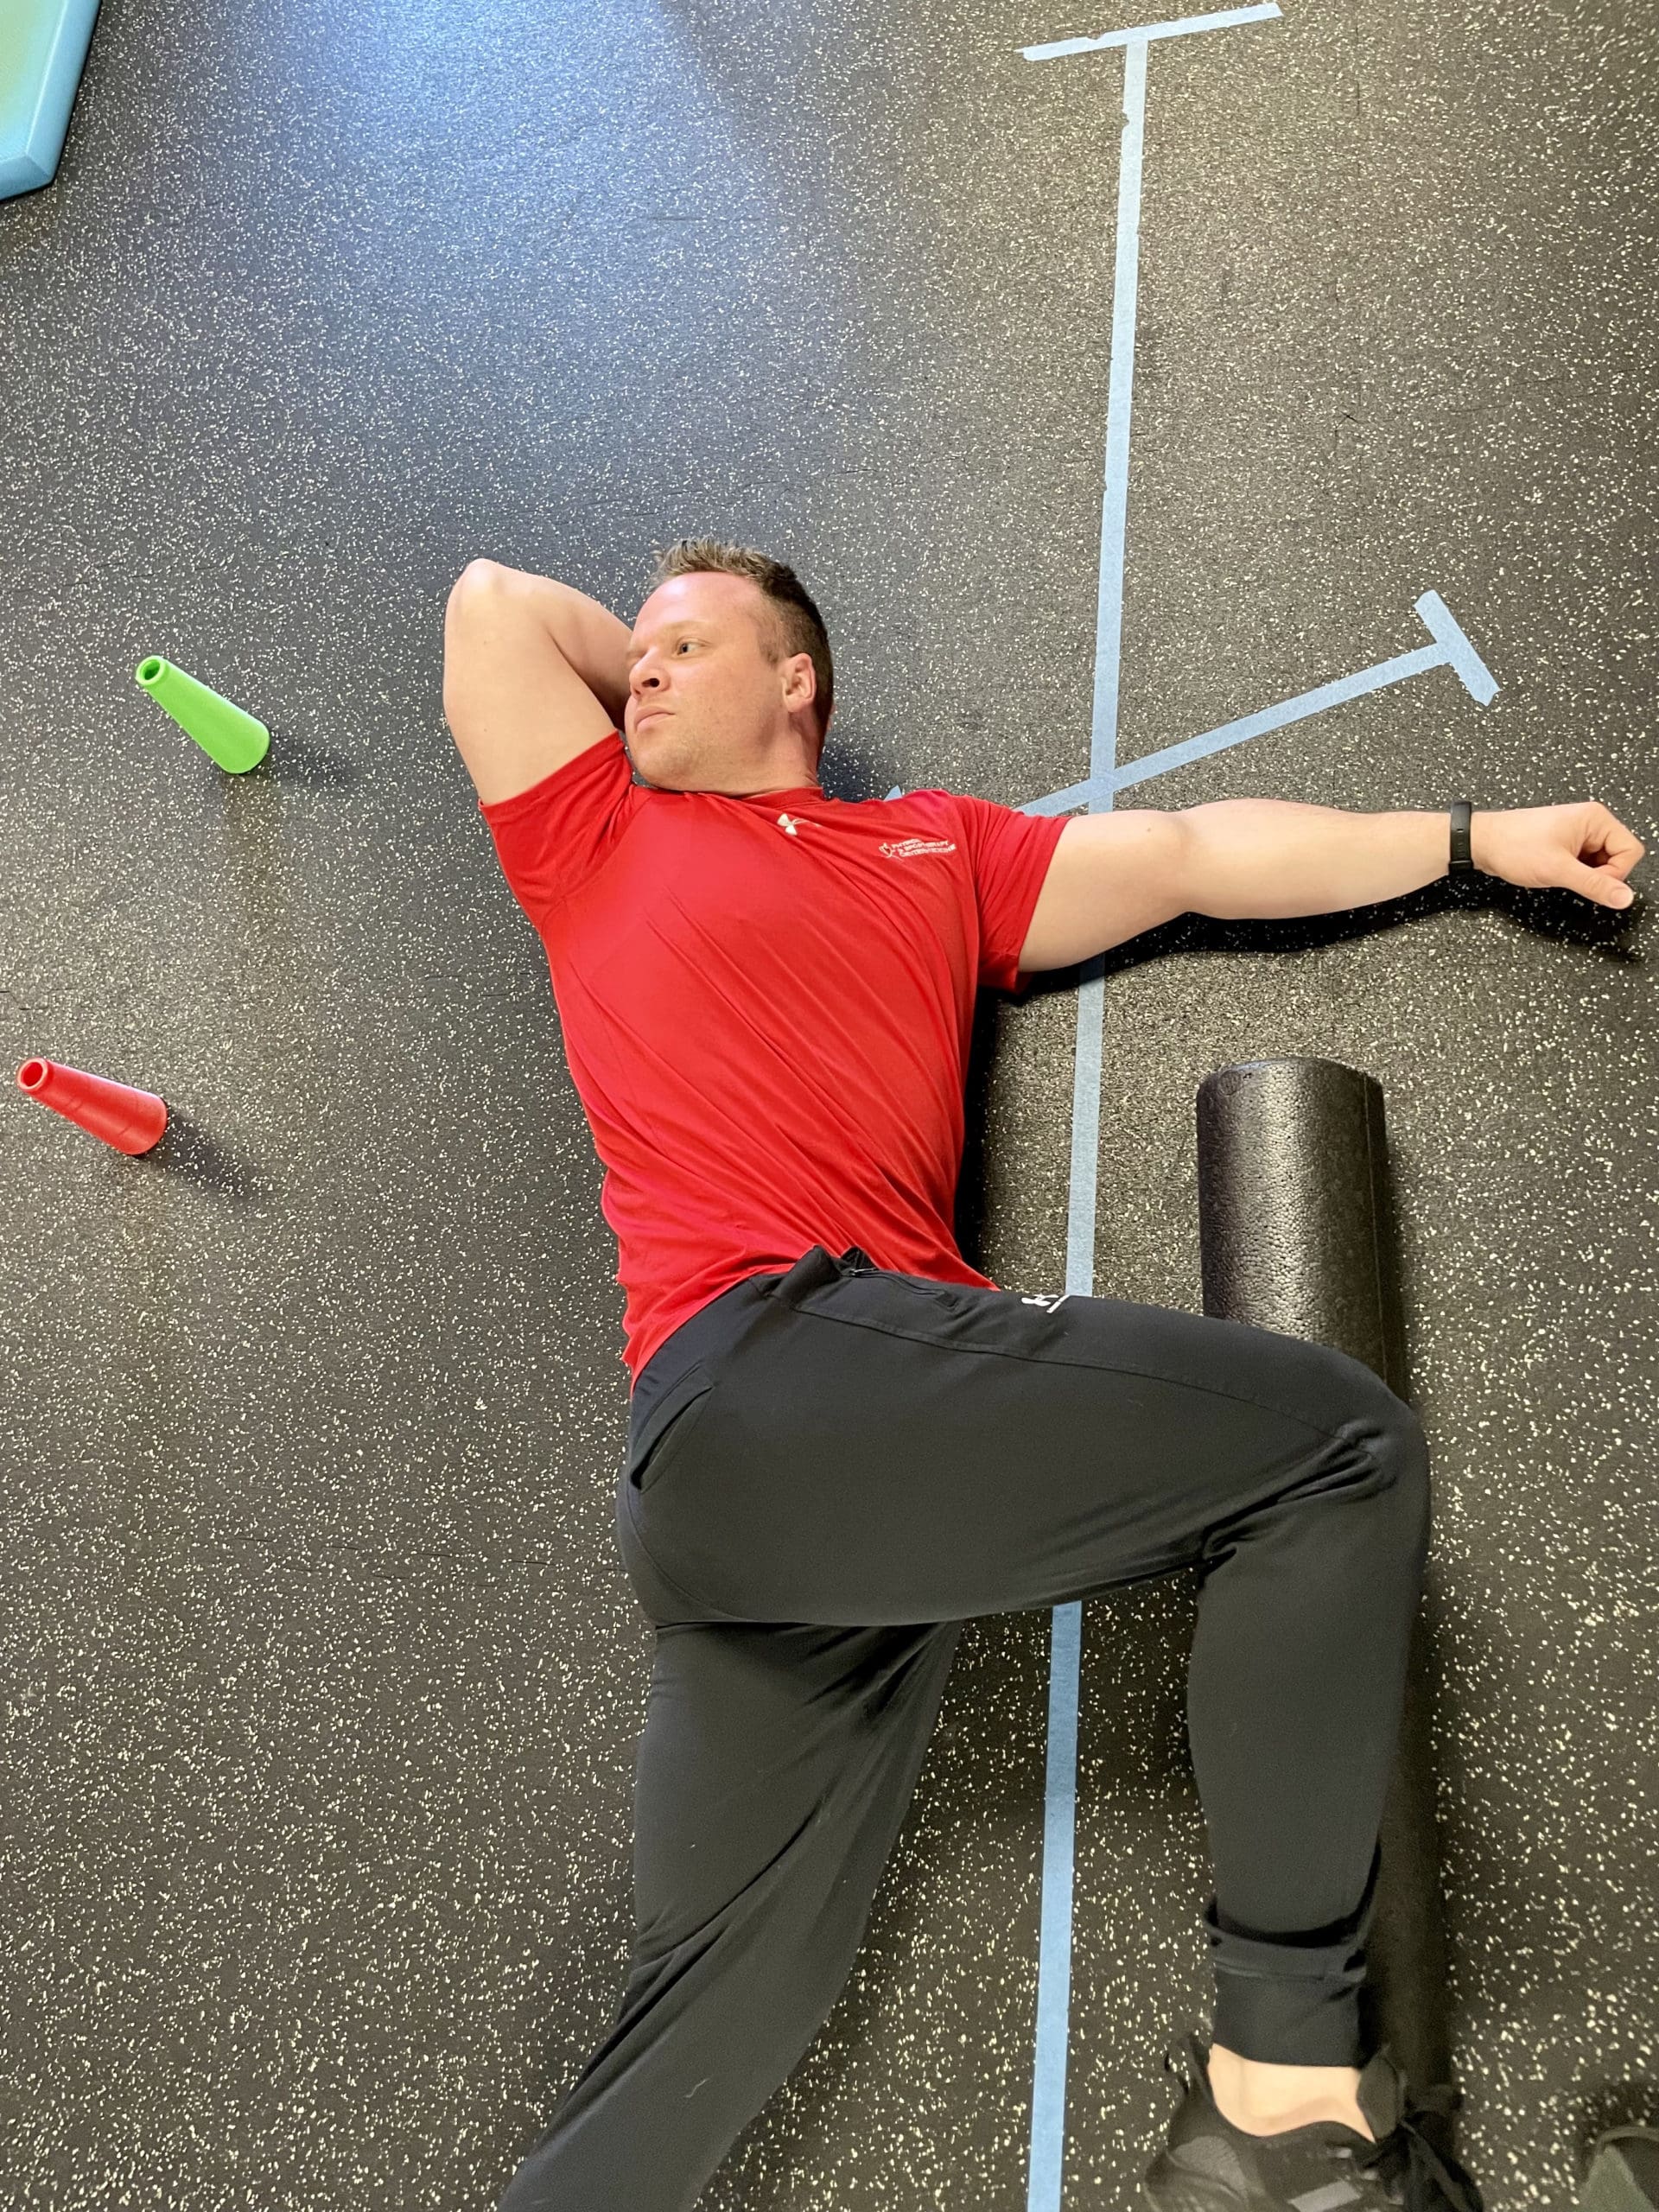
3. Side Lying Thoracic Rotations
This is a mobility drill to help improve upper back flexibility prior to any upper body lifting. We spend so much time sitting that our thoracic spine (upper back) commonly becomes stiff. If you have a stiff thoracic spine, your shoulders are more susceptible to discomfort when performing overhead lifting.
Start laying on one side and support the weight of your head with the top arm – this is not meant to be a neck exercise. Next, flex your top hip and drive your knee into a foam roller. This will keep your hips and lumbar spine stable so that this does not become a low back exercise. From here, rotate your upper back as far as you can comfortably.
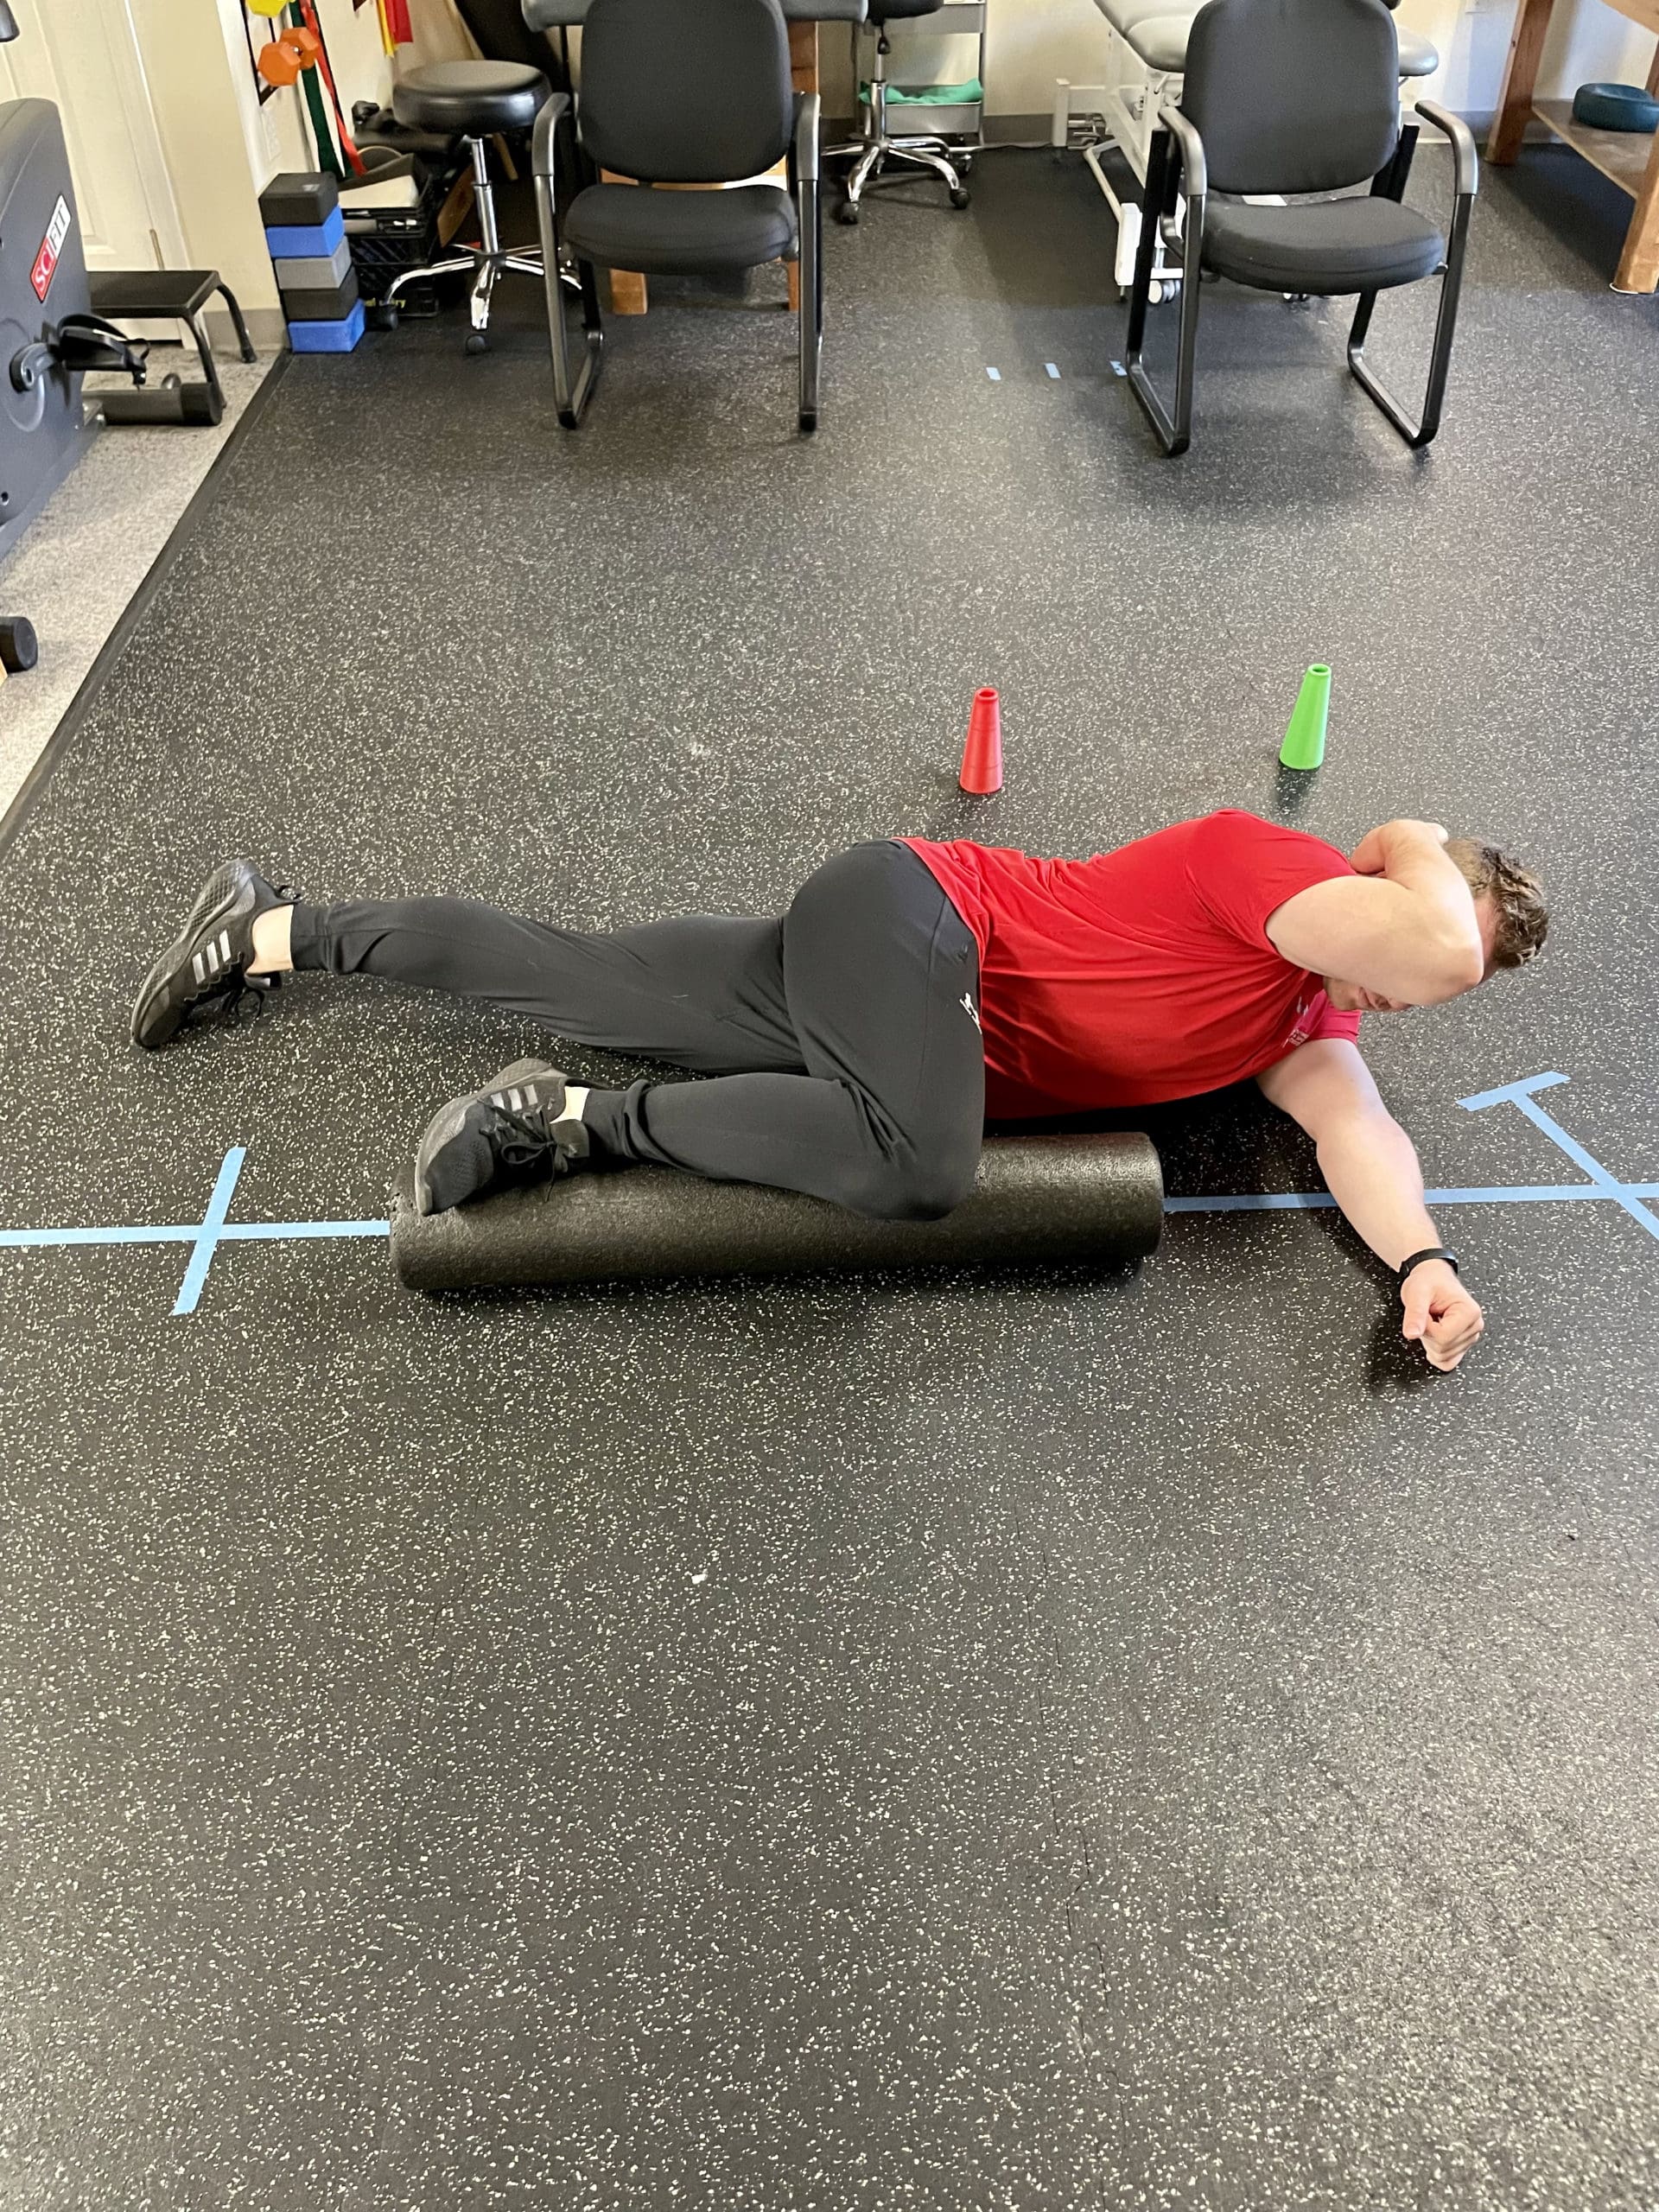
There are a few common errors with this drill. First, you should not feel this in your shoulder. If you do, you are most likely initiating the movement from your shoulder. To correct this, think about keeping your forearm glued to the side of your head. Lastly, you do not want to rotate directly backwards. If we think about our elbow as hands to a clock, we want to finish pointing at 10:00, not 9:00 (the green cone, not the red). If we look at the shape of our ribs and thoracic spine, this will be a far more comfortable position.
4. Facepulls
If you are looking for an exercise to help improve your posture and reduce shoulder pain, look no further than facepulls. Facepulls are a super effective way to warm up your shoulders prior to heavier lifting, or function as a stand alone exercise to help upper back and shoulder strength. They target all the muscles that get particularly weak from working a desk job – the same muscles that are dormant in people that have rounded shoulders or an excessive thoracic kyphosis.
To set up a facepull, you can use bands or a rope on a pulley machine starting at about eye level. How do you perform a facepull? It’s in the name! Pull the bands toward your head!
Correct Technique
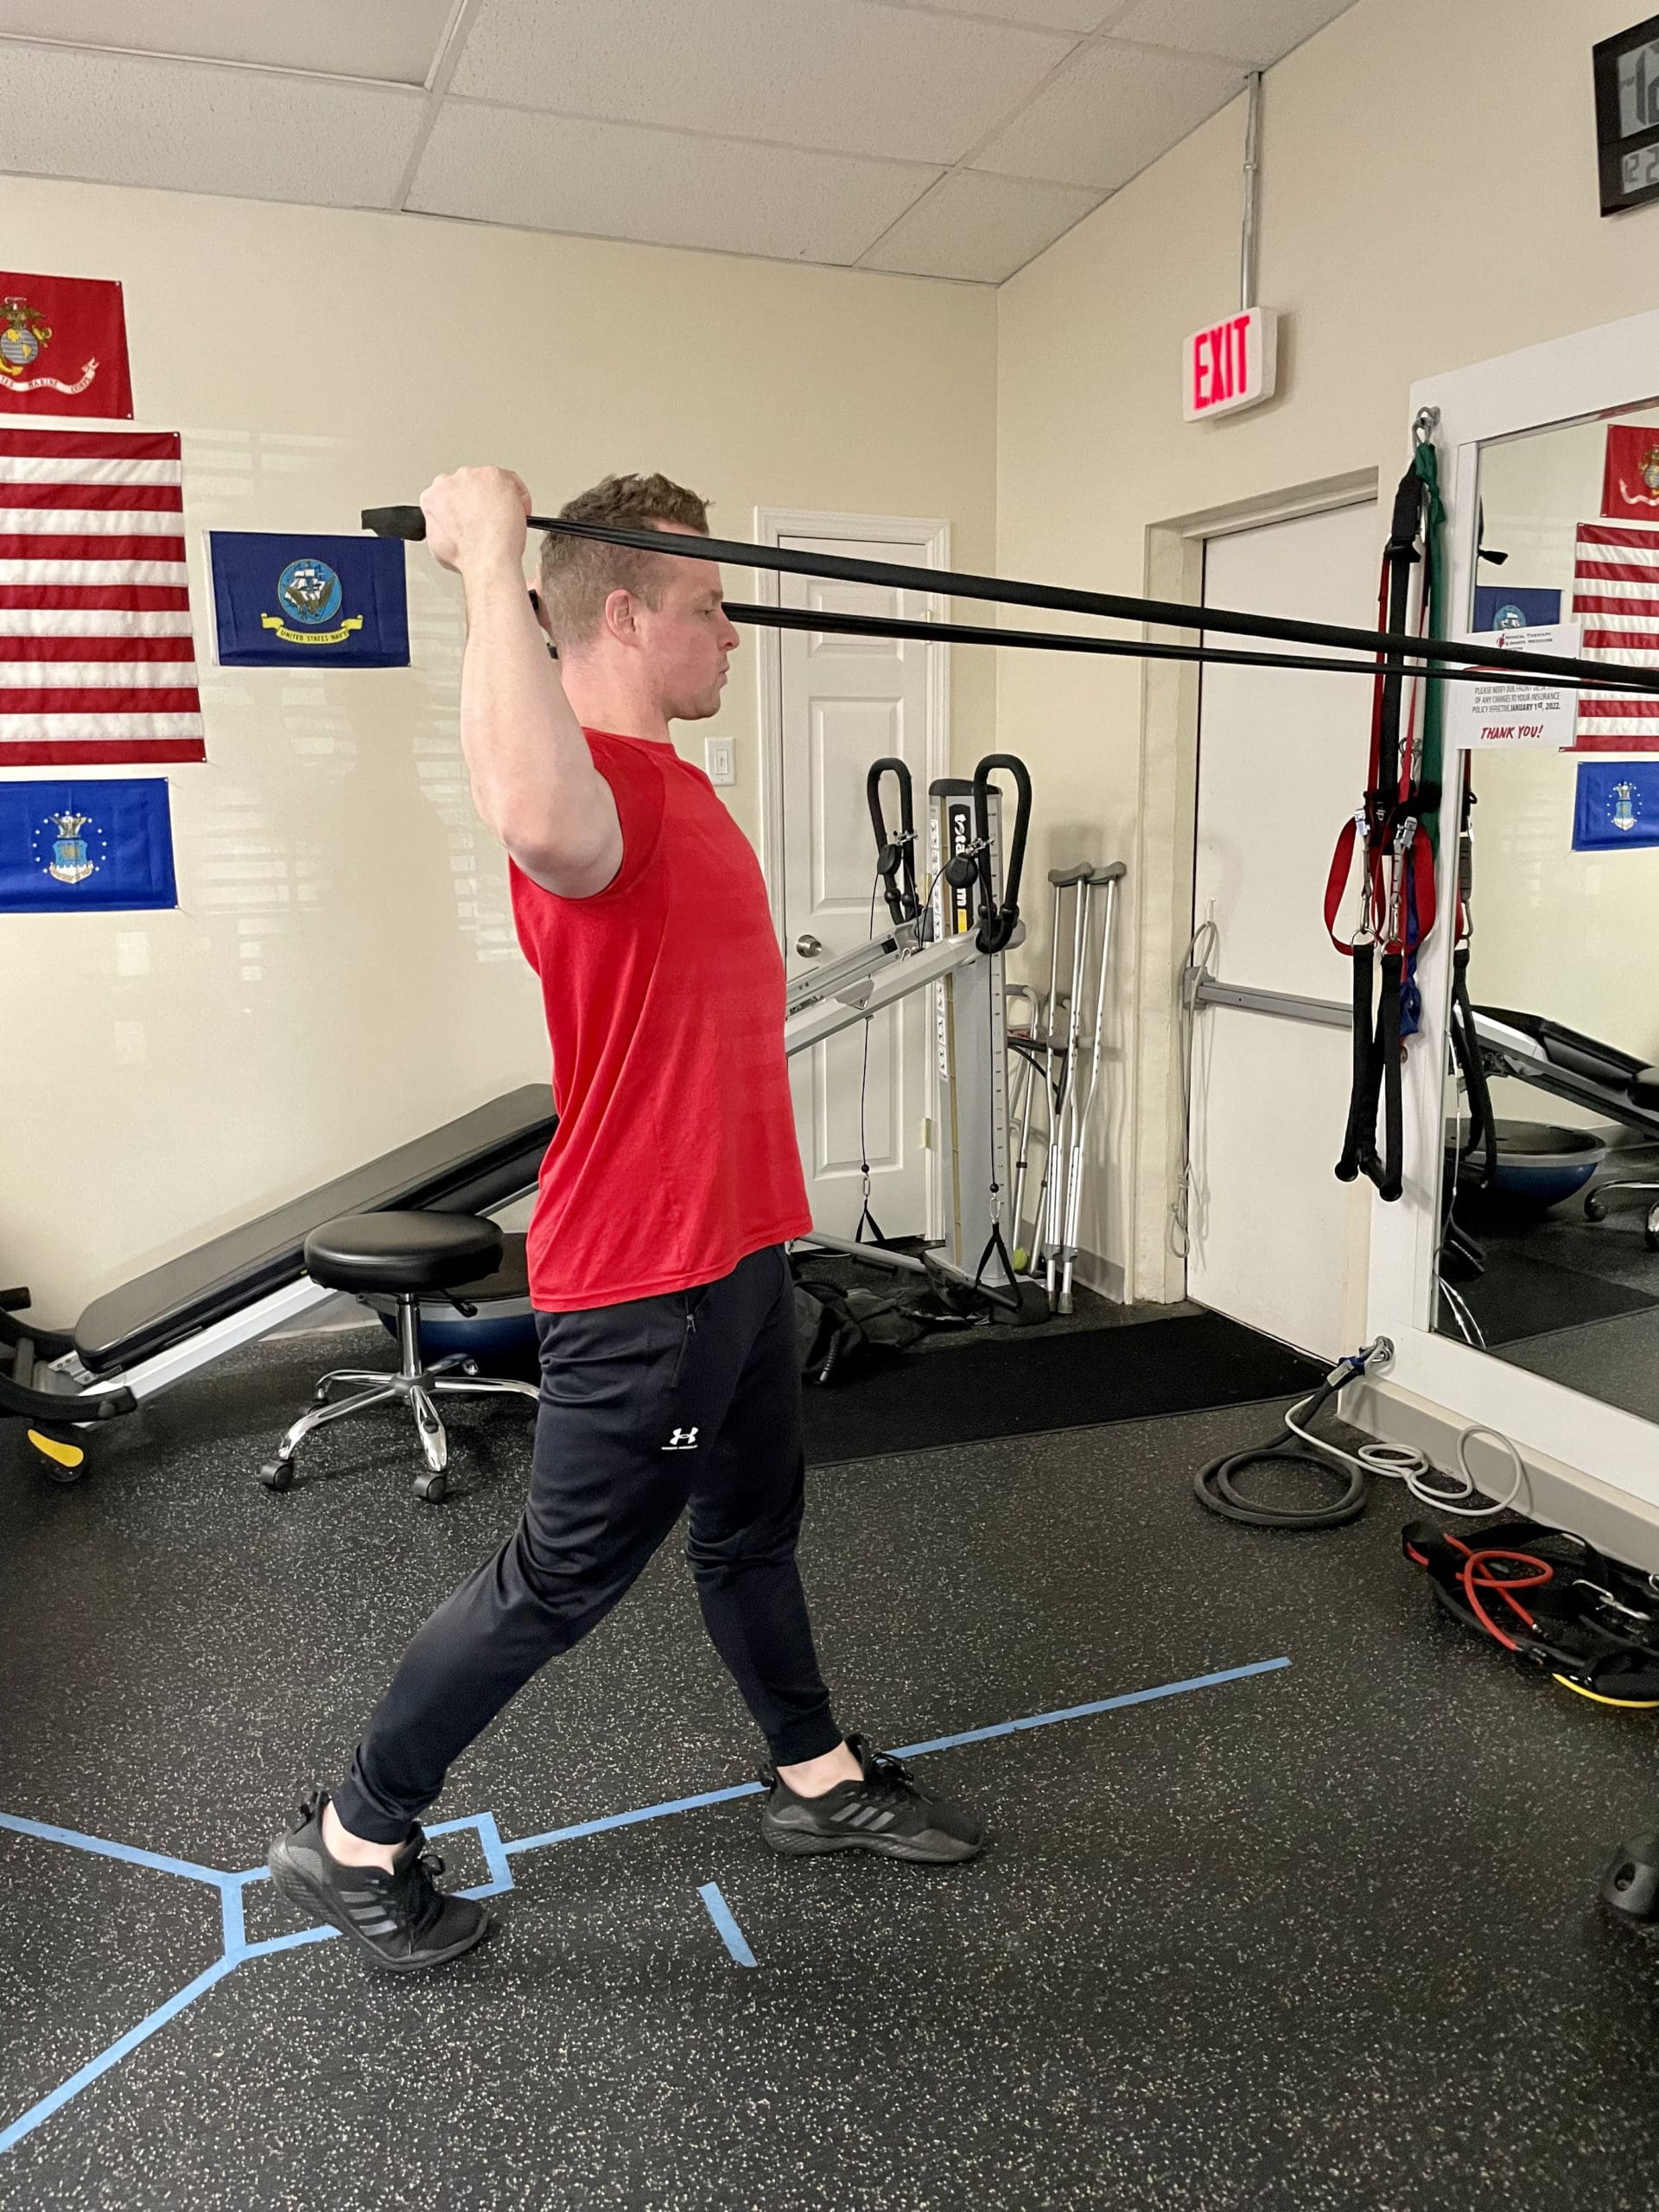
All kidding aside, there are some subtle technique points that will make this more effective. First, I would use a split stance to avoid your low back hyperextending during this movement. You should not feel yourself leaning backwards during the movement.
Next, this is meant to be a shoulder external rotation drill. To ensure you are truly doing this, think about finishing with your hands behind your elbows. While this might not actually happen, you should be internally cuing yourself to pull in this fashion.
Incorrect Technique (compared to the correct technique, the elbow is further back than the hands)

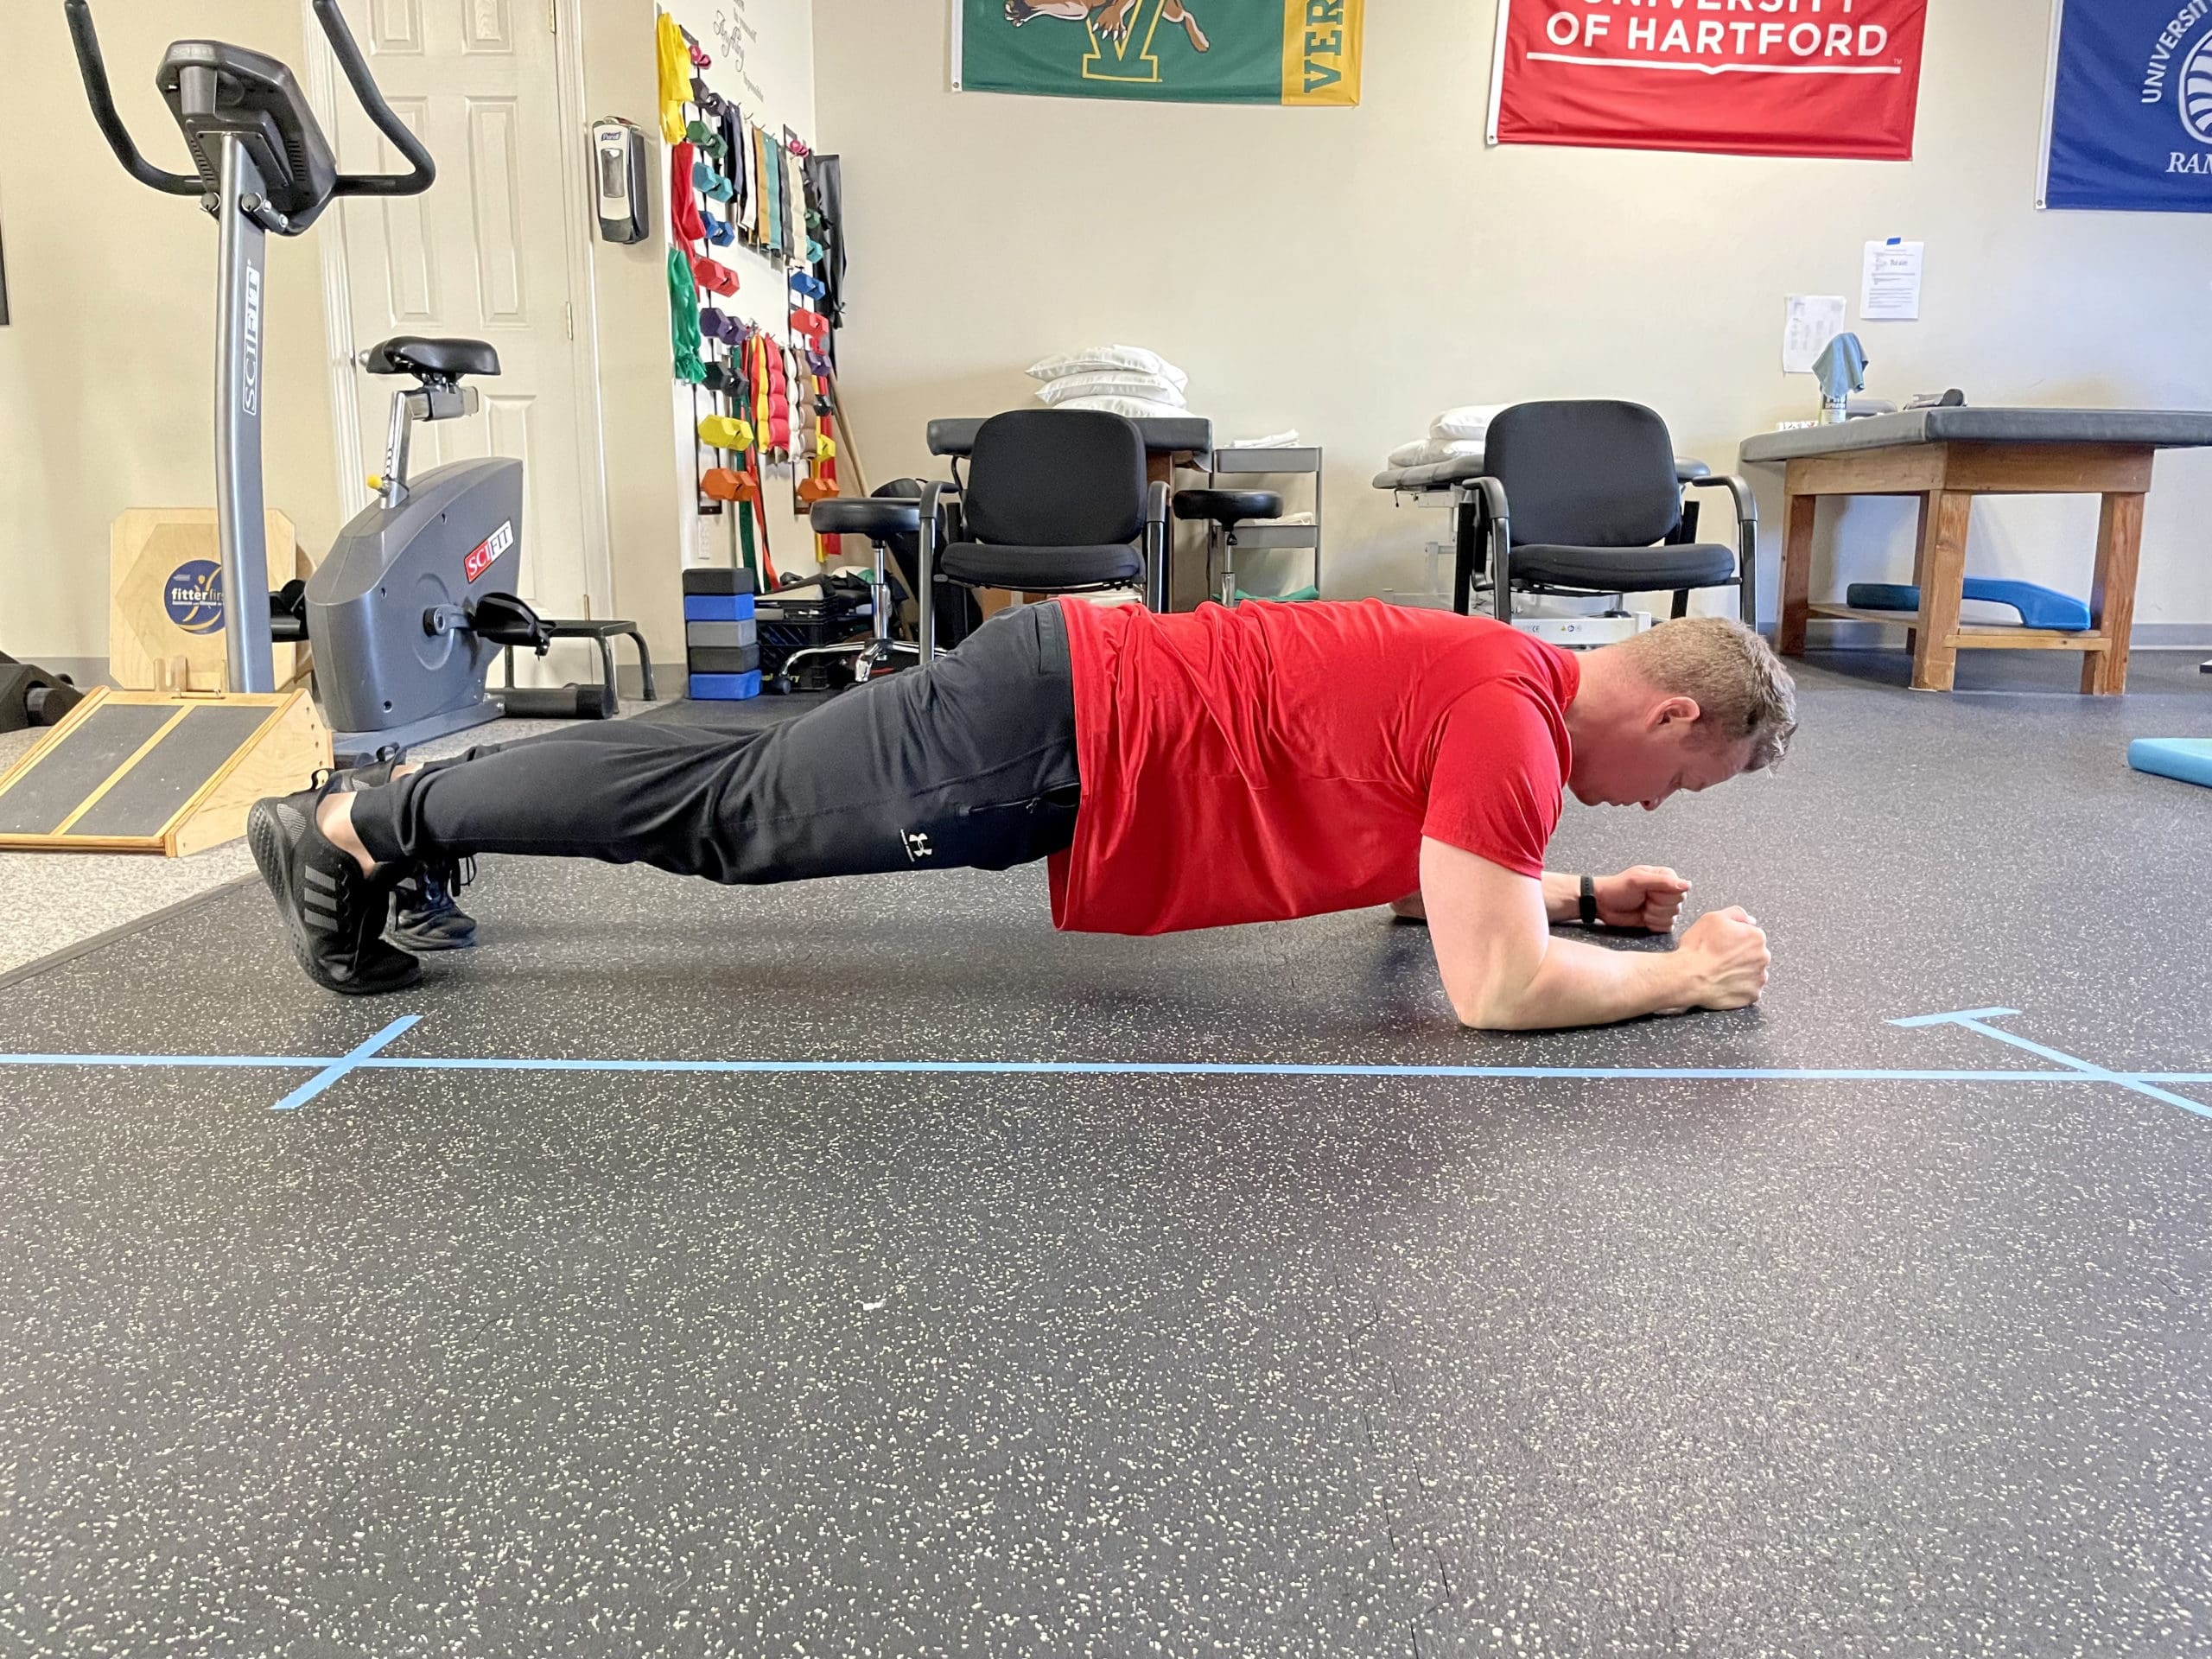
5. Long Lever Planks
New year, new plank variation. Gone are the days of holding a traditional plank for minutes on end. What if I told you there was a way to improve the activation in virtually every muscle in your core while planking for a fraction of the time?
It is actually quite simple – just walk your feet backwards a bit to create a Long Lever Plank. As you will see, simple does not necessarily mean easy. In this position, your low back is going to want to extend or arch. Your job is to resist this extension by tightening your core as hard as you can. Better results in half the time; what more could you want!
Regular Plank
Long Lever Plank
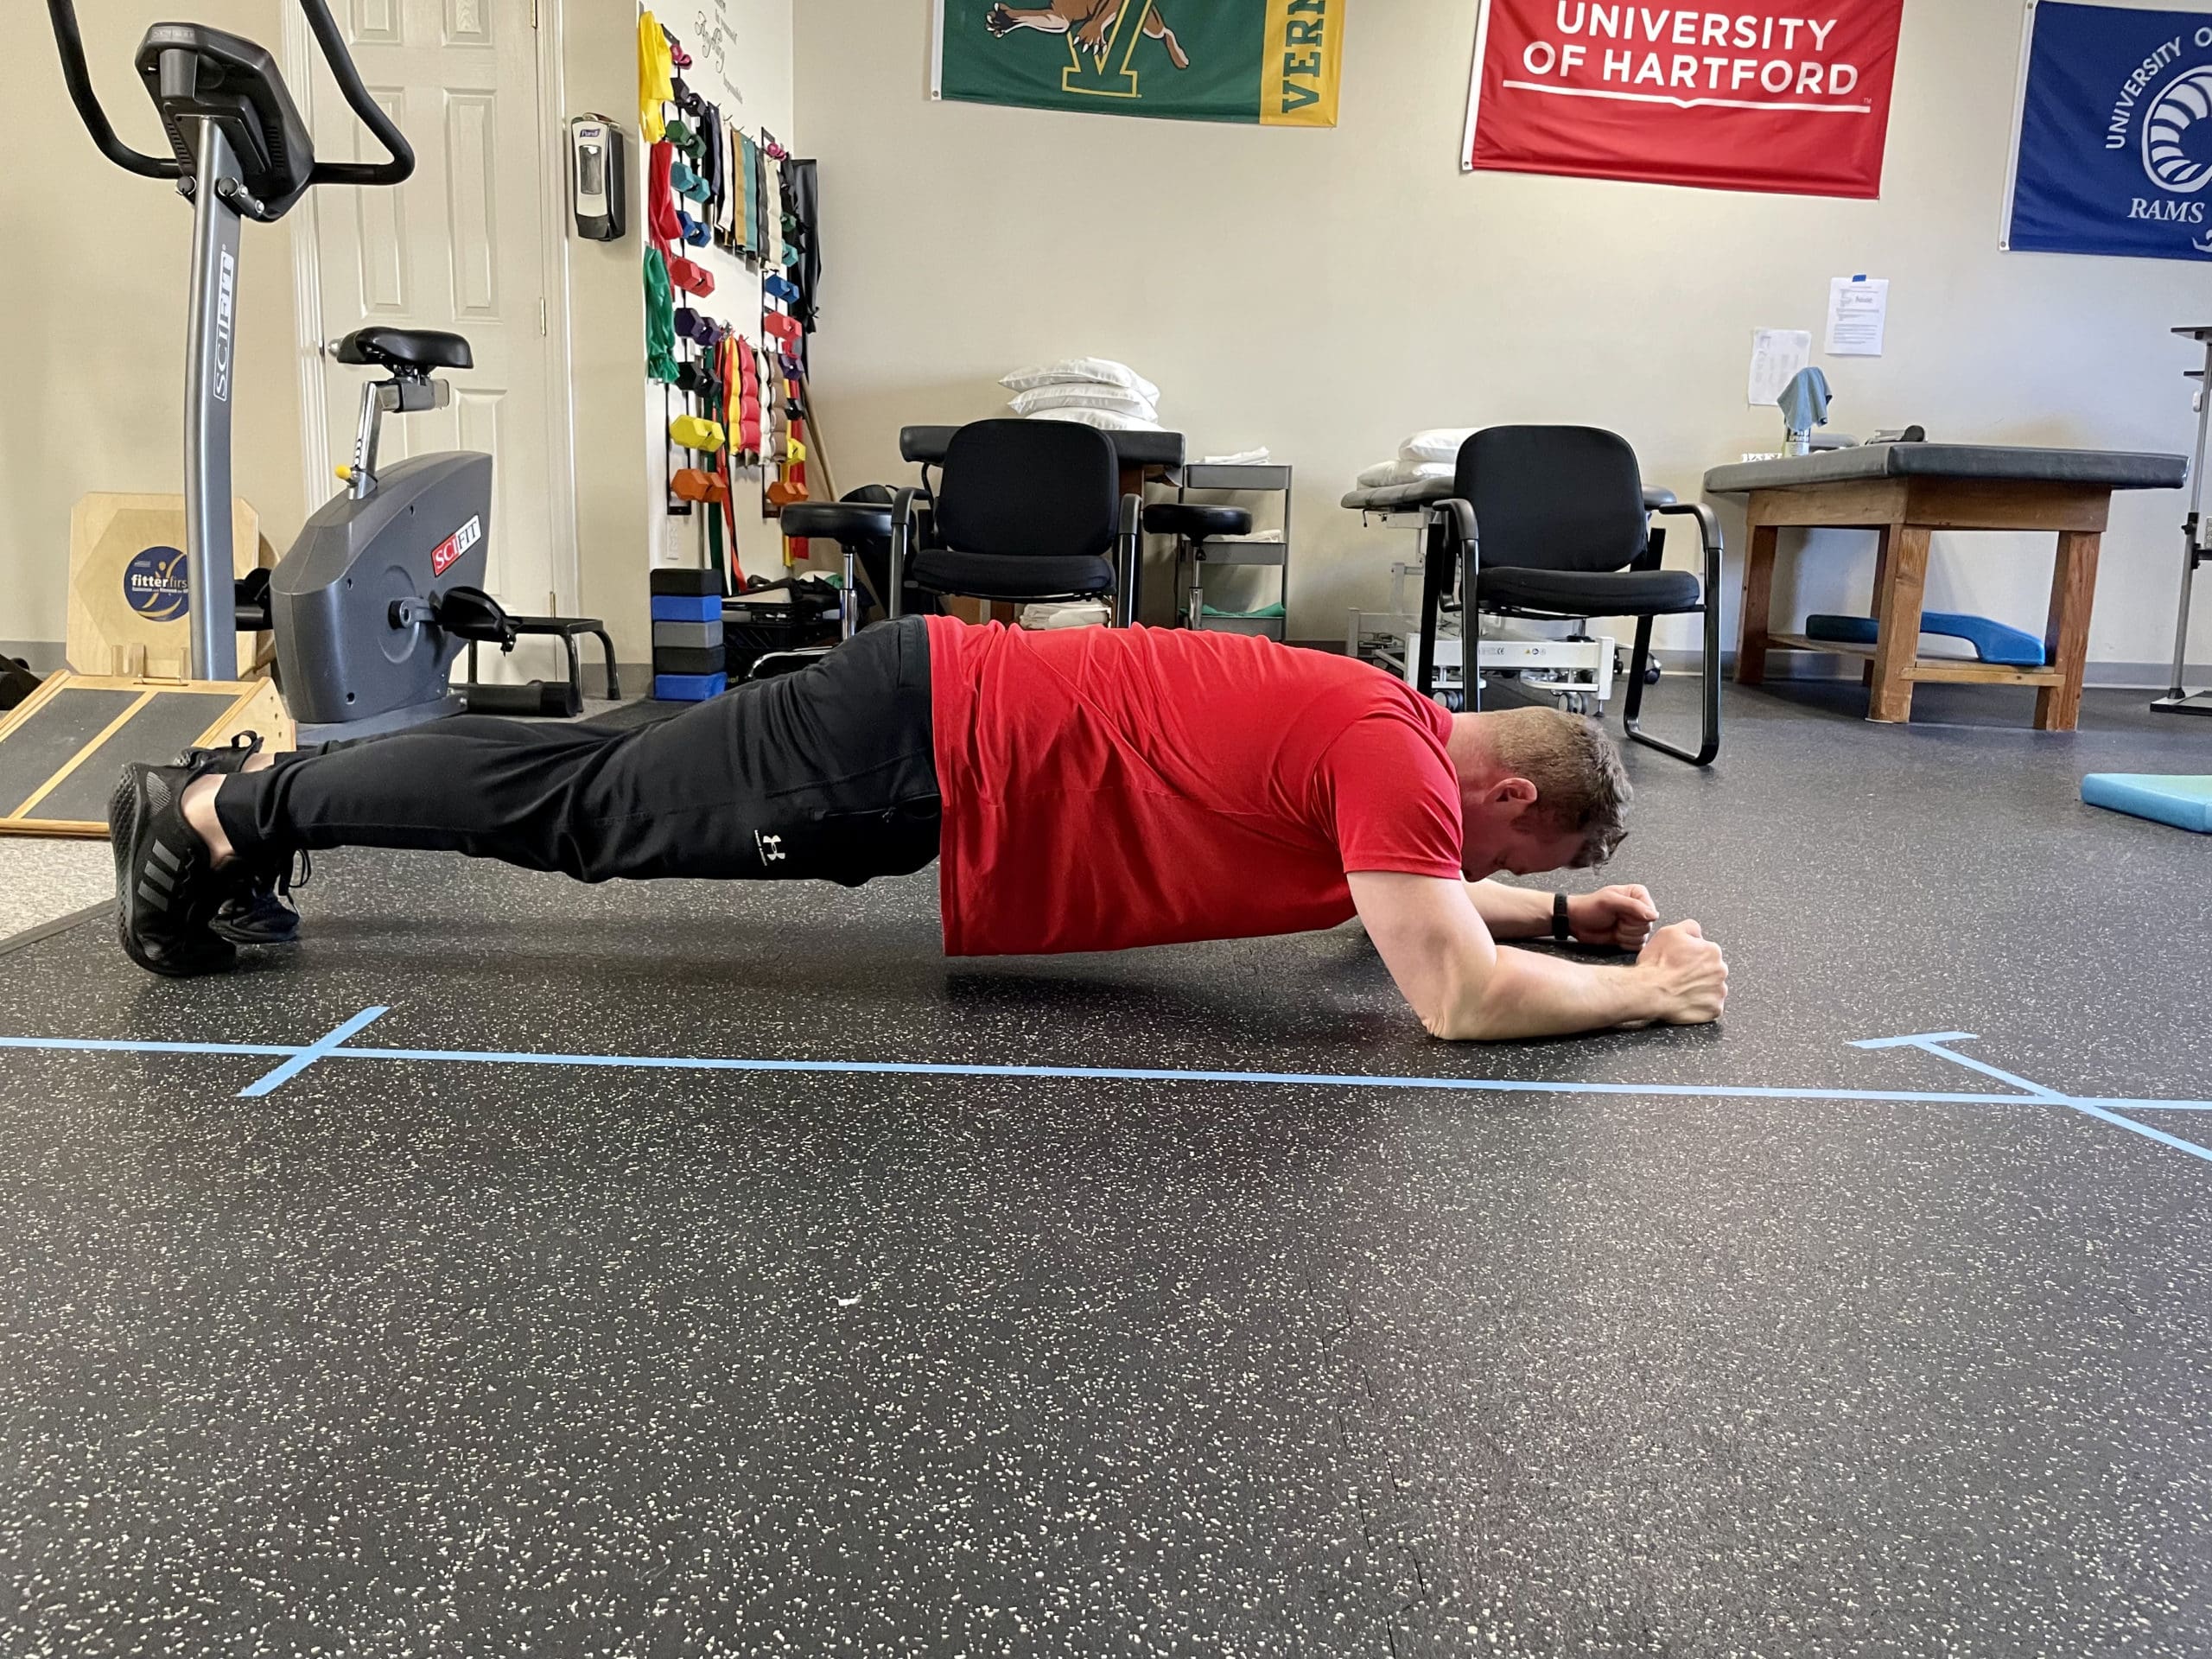
Notice how the elbow are directly under the shoulders in a regular plank, but in a long lever plank, the shoulders are closer to the top of the head. As you can see, you do not need to walk your feet back too far to significantly increase the challenge on your core.
These exercises are an excellent start to kick off your renewed interest in fitness, health, and strength training. For further personalized exercise prescription, or questions with the above exercises, email me at channing.harwood@ptsmc.com